'/%3e%3cpath%20fill-rule='evenodd'%20clip-rule='evenodd'%20d='M18%2080.9996C25.515%2086.6471%2034.875%2089.9996%2045%2089.9996C55.125%2089.9996%2064.485%2086.6471%2072%2080.9996H18Z'%20fill='%23FF2D55'/%3e%3cpath%20fill-rule='evenodd'%20clip-rule='evenodd'%20d='M9.00008%2071.9996C11.5651%2075.3971%2014.6026%2078.4346%2018.0001%2080.9996H72C75.3975%2078.4346%2078.435%2075.3971%2081%2071.9996H9.00008Z'%20fill='%23FFA25A'/%3e%3cpath%20fill-rule='evenodd'%20clip-rule='evenodd'%20d='M60.3675%2062.9997H3.75757C5.15257%2066.2172%206.93007%2069.2322%209.00006%2071.9997H60.39V62.9997H60.3675Z'%20fill='%23FFC95B'/%3e%3cpath%20fill-rule='evenodd'%20clip-rule='evenodd'%20d='M31.8826%2029.2496V62.9996H60.0075L31.8826%2029.2496Z'%20fill='url(%23paint1_linear_1_49380)'/%3e%3cpath%20fill-rule='evenodd'%20clip-rule='evenodd'%20d='M3.75757%2062.9997H31.8826V29.2497L3.75757%2062.9997Z'%20fill='white'/%3e%3cpath%20fill-rule='evenodd'%20clip-rule='evenodd'%20d='M60.3675%2047.25V72H81L60.3675%2047.25Z'%20fill='url(%23paint2_linear_1_49380)'/%3e%3cpath%20fill-rule='evenodd'%20clip-rule='evenodd'%20d='M39.7574%2072H60.3674V47.25L39.7574%2072Z'%20fill='white'/%3e%3cpath%20fill-rule='evenodd'%20clip-rule='evenodd'%20d='M60.3675%2040.4997C66.5807%2040.4997%2071.6175%2035.4629%2071.6175%2029.2497C71.6175%2023.0365%2066.5807%2017.9997%2060.3675%2017.9997C54.1543%2017.9997%2049.1175%2023.0365%2049.1175%2029.2497C49.1175%2035.4629%2054.1543%2040.4997%2060.3675%2040.4997Z'%20fill='%23FFC95B'/%3e%3cpath%20fill-rule='evenodd'%20clip-rule='evenodd'%20d='M31.8824%2022.4997C34.989%2022.4997%2037.5074%2019.9813%2037.5074%2016.8747C37.5074%2013.7681%2034.989%2011.2497%2031.8824%2011.2497C28.7758%2011.2497%2026.2574%2013.7681%2026.2574%2016.8747C26.2574%2019.9813%2028.7758%2022.4997%2031.8824%2022.4997Z'%20fill='%23FFC95B'/%3e%3cdefs%3e%3clinearGradient%20id='paint0_linear_1_49380'%20x1='45'%20y1='-18.6396'%20x2='-18.6396'%20y2='45'%20gradientUnits='userSpaceOnUse'%3e%3cstop%20stop-color='%23FF2D55'/%3e%3cstop%20offset='1'%20stop-color='%23FFBC5B'/%3e%3c/linearGradient%3e%3clinearGradient%20id='paint1_linear_1_49380'%20x1='31.8731'%20y1='29.2497'%20x2='31.8731'%20y2='62.9996'%20gradientUnits='userSpaceOnUse'%3e%3cstop%20stop-color='%23A524B3'/%3e%3cstop%20offset='1'%20stop-color='%23FF2D55'/%3e%3c/linearGradient%3e%3clinearGradient%20id='paint2_linear_1_49380'%20x1='60.3605'%20y1='47.25'%20x2='60.3605'%20y2='72'%20gradientUnits='userSpaceOnUse'%3e%3cstop%20stop-color='%23A524B3'/%3e%3cstop%20offset='1'%20stop-color='%23FF2D55'/%3e%3c/linearGradient%3e%3c/defs%3e%3c/svg%3e)
AI Assistant
Build and change your scene by chatting with an AI assistant inside the Creator Hub.
The Creator Hub can run an AI assistant that sees your open scene and edits it for you. Ask it to place items, wire up behavior, write scripts, or run the preview and check the result.
📔 Note: The assistant runs a coding CLI that you install and sign into, with full access to your machine, the same reach it has in your terminal. Only enable it if you trust what you ask it to do.
Where its settings live
The assistant is on by default. Its settings have their own tab:
- Click the Creator Hub logo in the top-left corner and select Settings.
- Go to the AI tab.
That tab holds the Enable AI Assistant switch, the Bill this to an API key instead option, the Connect list of coding CLIs, and the Expose AI assistant MCP server settings.
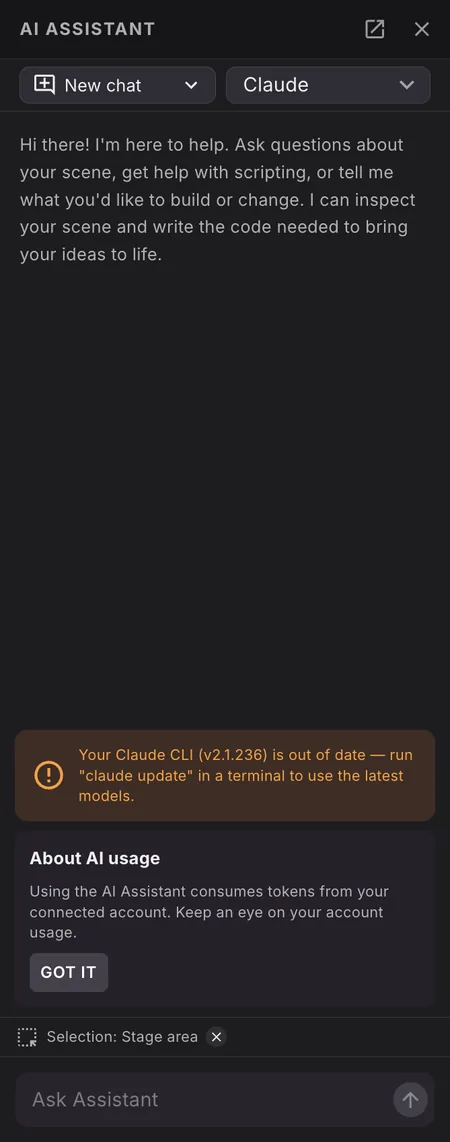
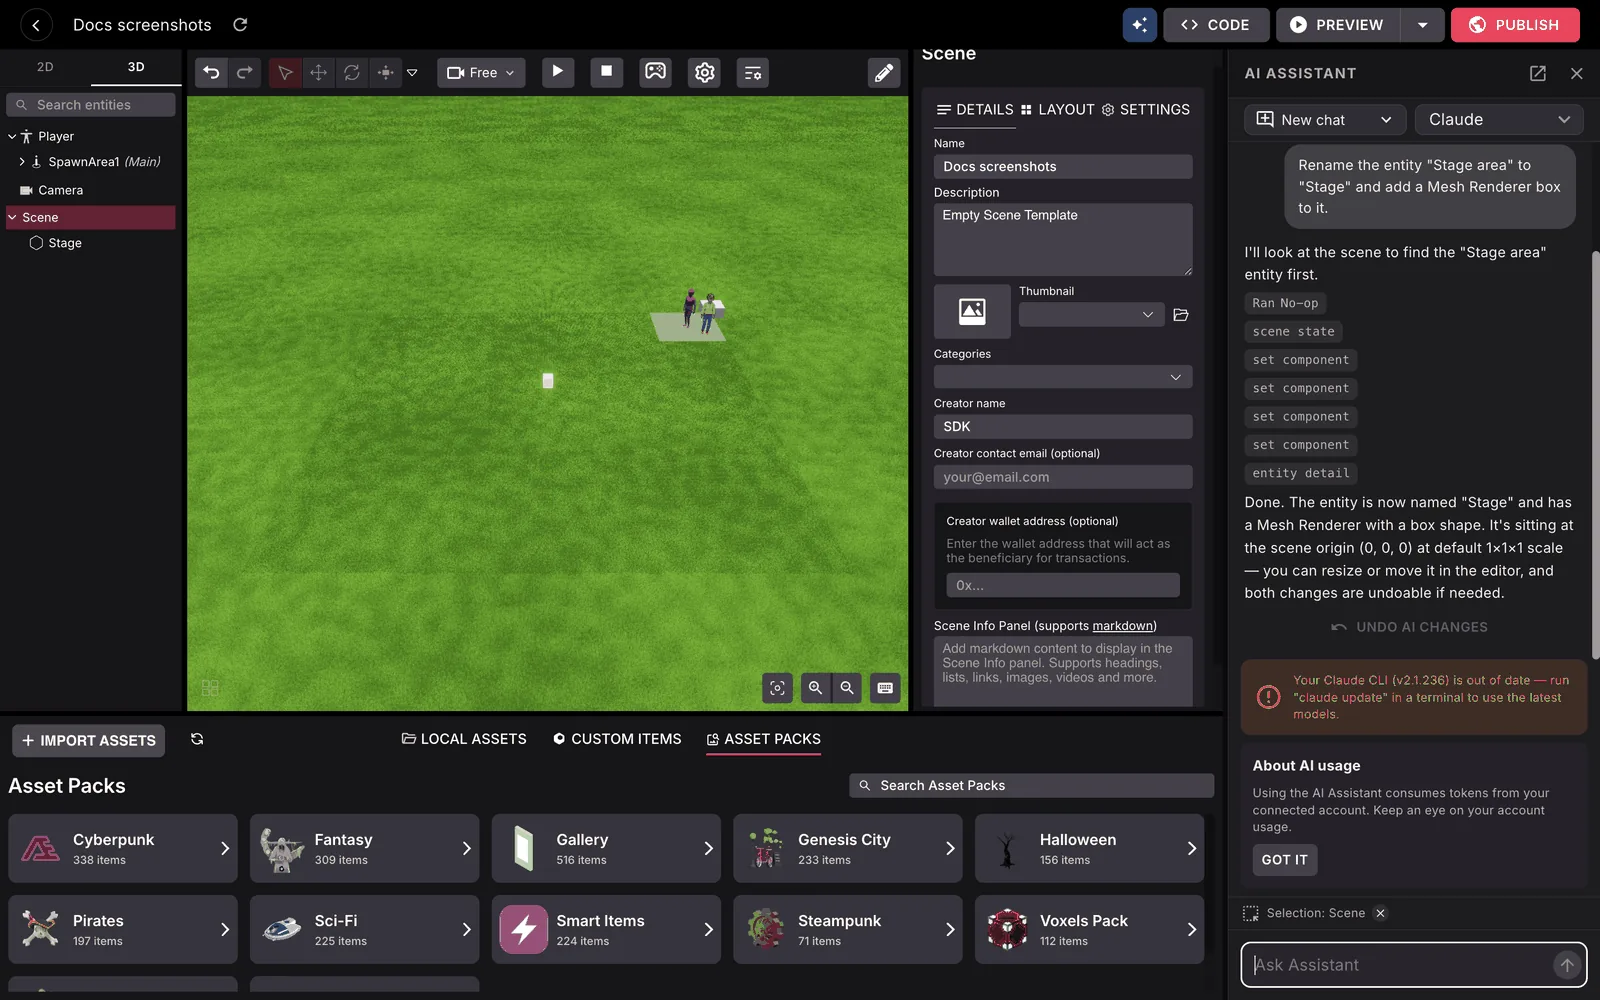
When the assistant is on, an AI Assistant button (the sparkles icon) appears in the editor's top bar, to the left of the Code button. Click it to open the chat panel beside your scene.

Connect a coding CLI
The assistant does not use an API key of its own. It runs a coding CLI that you install and sign into, so the work is billed to that tool's own subscription.
Four are supported:
| CLI | Install | Sign in |
|---|---|---|
| Claude | npm i -g @anthropic-ai/claude-code |
claude |
| Codex | npm i -g @openai/codex |
codex login |
| Cursor | npm i -g cursor-agent |
cursor-agent login |
| Gemini | npm i -g @google/gemini-cli |
gemini |
You can do this from inside the Creator Hub. In the settings, on the AI tab under Connect, each detected CLI shows its status and a Sign in link that runs the login for you and opens your browser. A green dot and Connected mean it is ready. Sign out disconnects it.
If you prefer to do it yourself, open the Via Terminal section under a CLI. It gives you the exact Install and Sign In commands to copy.
📔 Note: Gemini has no Sign in button. Its login only runs as an interactive session, so sign in by running gemini in a terminal, or set a GEMINI_API_KEY in your environment.
The same setup card appears in the chat panel itself the first time you open it with no CLI connected.
💡 Tip: If you have more than one CLI signed in, a dropdown in the chat panel lets you switch between them.
Bill to an API key instead
If you would rather pay per token than use a CLI subscription, switch on Bill this to an API key instead on the AI tab of the settings. It reads your provider's API key from your environment: ANTHROPIC_API_KEY, OPENAI_API_KEY, CURSOR_API_KEY or GEMINI_API_KEY. This is off by default.
What it can do
The assistant works on the scene you have open. It can:
- Edit the scene: create and delete entities, change components, place smart items, attach scripts, and read and write
scene.json. - Write code in your scene's files.
- Run the preview and drive it: take screenshots, walk around, click things, read the logs, and check performance.
- Read your selection, so you can select an entity and say "make this one taller".
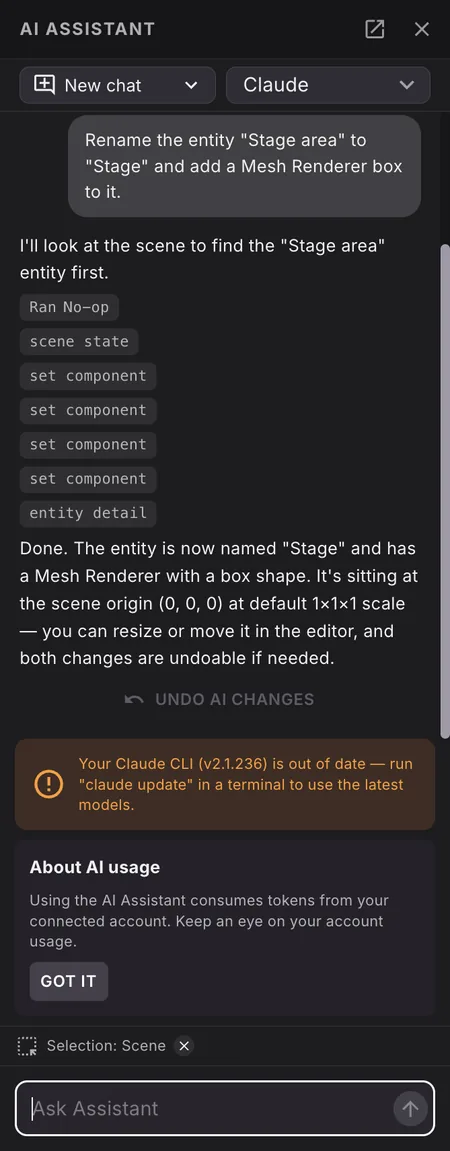
Changes are saved as they happen and go into the normal undo history. To take back a whole exchange at once, use Undo AI changes on the assistant's reply.
While the assistant works, its changes show up live in the entity tree and the canvas.
Working with the chat
- New chat starts a fresh conversation.
- Chat history lists earlier conversations with how long ago they ran. Conversations are saved per project, so reopening a scene brings its chats back.
- Open in a separate window pops the assistant out into its own window, which is handy on a second monitor. Dock back in the editor returns it.
- The panel can be dragged wider or narrower.
An About AI usage card reminds you that the assistant consumes tokens from your connected account. Keep an eye on that account's usage.
If your Claude CLI is too old, the panel shows a warning. Run claude update in a terminal to fix it.
Decentraland skills are installed for you
When the assistant runs, the Creator Hub downloads the official Decentraland SDK Skills and links them into your project, so the assistant follows verified SDK7 patterns instead of guessing.
They are linked at .claude/skills and .agents/skills inside your project folder, and both are added to a .gitignore for you, so they never end up in your repo.
Files the assistant leaves in your scene folder
The assistant can read and edit your open scene through a local MCP server. Each CLI is told about that server differently, so depending on which one you use, you may find new files in your project:
| CLI | What appears in the scene folder |
|---|---|
| Cursor | .cursor/mcp.json, plus .cursor/rules/creator-hub.mdc |
| Gemini | .gemini/settings.json |
| Claude | Nothing. The configuration goes in a temporary file outside your project. |
| Codex | Nothing. The configuration is passed on the command line. |
If you already have one of those configuration files, the Creator Hub merges its entry into it instead of overwriting your own servers.
📔 Note: .cursor/mcp.json is the one file that contains the access token itself, because Cursor's configuration format has no way to read it from the environment. The Creator Hub adds it to your .gitignore before writing it, so don't commit it or remove that line. The Gemini file references the token through a $CREATOR_HUB_MCP_TOKEN environment variable instead, so it holds no secret and isn't ignored.
Use your own AI tool instead
If you already work in Claude Code, Cursor, Codex, or another tool that speaks MCP, you can point it at the open scene rather than using the built-in panel. MCP (Model Context Protocol) is a standard way for an AI tool to call out to another program.
- Open the main menu from the Creator Hub logo, select Settings, and on the AI tab expand Expose AI assistant MCP server.
- Click Copy configuration.
- Paste it into your tool's MCP configuration.
The copied configuration looks like this, with a real port and token filled in:
{
  "mcpServers": {
    "creator-hub": {
      "type": "http",
      "url": "http://127.0.0.1:<PORT>/mcp",
      "headers": { "Authorization": "Bearer <TOKEN>" }
    }
  }
}
For Claude Code, you can instead add it from a terminal in your scene folder:
claude mcp add --transport http --scope local creator-hub http://127.0.0.1:<PORT>/mcp \
  --header "Authorization: Bearer <TOKEN>"
📔 Note: The port and the token are new every time the Creator Hub starts. If your tool suddenly gets a 401 error, copy the configuration again. The server only listens on your own machine, and only ever acts on the scene you have open.
Related pages
- Vibe Coding with AI: the full guide to the SDK Skills and to prompting well.
- Combine with code: open your scene in a code editor.
- Using the Script Component: attach behavior to an entity from a file.