'/%3e%3cpath%20fill-rule='evenodd'%20clip-rule='evenodd'%20d='M18%2080.9996C25.515%2086.6471%2034.875%2089.9996%2045%2089.9996C55.125%2089.9996%2064.485%2086.6471%2072%2080.9996H18Z'%20fill='%23FF2D55'/%3e%3cpath%20fill-rule='evenodd'%20clip-rule='evenodd'%20d='M9.00008%2071.9996C11.5651%2075.3971%2014.6026%2078.4346%2018.0001%2080.9996H72C75.3975%2078.4346%2078.435%2075.3971%2081%2071.9996H9.00008Z'%20fill='%23FFA25A'/%3e%3cpath%20fill-rule='evenodd'%20clip-rule='evenodd'%20d='M60.3675%2062.9997H3.75757C5.15257%2066.2172%206.93007%2069.2322%209.00006%2071.9997H60.39V62.9997H60.3675Z'%20fill='%23FFC95B'/%3e%3cpath%20fill-rule='evenodd'%20clip-rule='evenodd'%20d='M31.8826%2029.2496V62.9996H60.0075L31.8826%2029.2496Z'%20fill='url(%23paint1_linear_1_49380)'/%3e%3cpath%20fill-rule='evenodd'%20clip-rule='evenodd'%20d='M3.75757%2062.9997H31.8826V29.2497L3.75757%2062.9997Z'%20fill='white'/%3e%3cpath%20fill-rule='evenodd'%20clip-rule='evenodd'%20d='M60.3675%2047.25V72H81L60.3675%2047.25Z'%20fill='url(%23paint2_linear_1_49380)'/%3e%3cpath%20fill-rule='evenodd'%20clip-rule='evenodd'%20d='M39.7574%2072H60.3674V47.25L39.7574%2072Z'%20fill='white'/%3e%3cpath%20fill-rule='evenodd'%20clip-rule='evenodd'%20d='M60.3675%2040.4997C66.5807%2040.4997%2071.6175%2035.4629%2071.6175%2029.2497C71.6175%2023.0365%2066.5807%2017.9997%2060.3675%2017.9997C54.1543%2017.9997%2049.1175%2023.0365%2049.1175%2029.2497C49.1175%2035.4629%2054.1543%2040.4997%2060.3675%2040.4997Z'%20fill='%23FFC95B'/%3e%3cpath%20fill-rule='evenodd'%20clip-rule='evenodd'%20d='M31.8824%2022.4997C34.989%2022.4997%2037.5074%2019.9813%2037.5074%2016.8747C37.5074%2013.7681%2034.989%2011.2497%2031.8824%2011.2497C28.7758%2011.2497%2026.2574%2013.7681%2026.2574%2016.8747C26.2574%2019.9813%2028.7758%2022.4997%2031.8824%2022.4997Z'%20fill='%23FFC95B'/%3e%3cdefs%3e%3clinearGradient%20id='paint0_linear_1_49380'%20x1='45'%20y1='-18.6396'%20x2='-18.6396'%20y2='45'%20gradientUnits='userSpaceOnUse'%3e%3cstop%20stop-color='%23FF2D55'/%3e%3cstop%20offset='1'%20stop-color='%23FFBC5B'/%3e%3c/linearGradient%3e%3clinearGradient%20id='paint1_linear_1_49380'%20x1='31.8731'%20y1='29.2497'%20x2='31.8731'%20y2='62.9996'%20gradientUnits='userSpaceOnUse'%3e%3cstop%20stop-color='%23A524B3'/%3e%3cstop%20offset='1'%20stop-color='%23FF2D55'/%3e%3c/linearGradient%3e%3clinearGradient%20id='paint2_linear_1_49380'%20x1='60.3605'%20y1='47.25'%20x2='60.3605'%20y2='72'%20gradientUnits='userSpaceOnUse'%3e%3cstop%20stop-color='%23A524B3'/%3e%3cstop%20offset='1'%20stop-color='%23FF2D55'/%3e%3c/linearGradient%3e%3c/defs%3e%3c/svg%3e)
Publish Scene
How to publish your scene to LAND or a NAME.
Before you begin
Make sure of the following:
- Your scene complies with all of the scene limitations. Most of these are validated each time you run a preview of your scene.
- You have a Metamask account, with your LAND parcels or NAME assigned to it.
- You own the necessary amount of adjacent LAND parcels or a Decentraland NAME. Otherwise you can purchase LAND in the Marketplace or a NAME in the Marketplace.
📔 Note: Multi-parcel scenes can only be deployed to adjacent parcels.
Check your scene's details, make sure you provide an appealing name, description, thumbnail, categories, etc.
❗Warning: When planning live events, don't make last minute changes to the scene right before the event. Publish your final version at least an hour before the event starts.
Players who already had loaded the scene in the current session before your updates will continue to see a cached version of the scene. To see the renewed version they must close and re-enter Decentraland.
Publish your scene
To publish your scene:
- Open your scene in the Scene Editor and click Publish. This opens a window showing details about the publication.
- Select if you want to publish to LAND or to a WORLD. See Kinds of projects to better understand the different options.
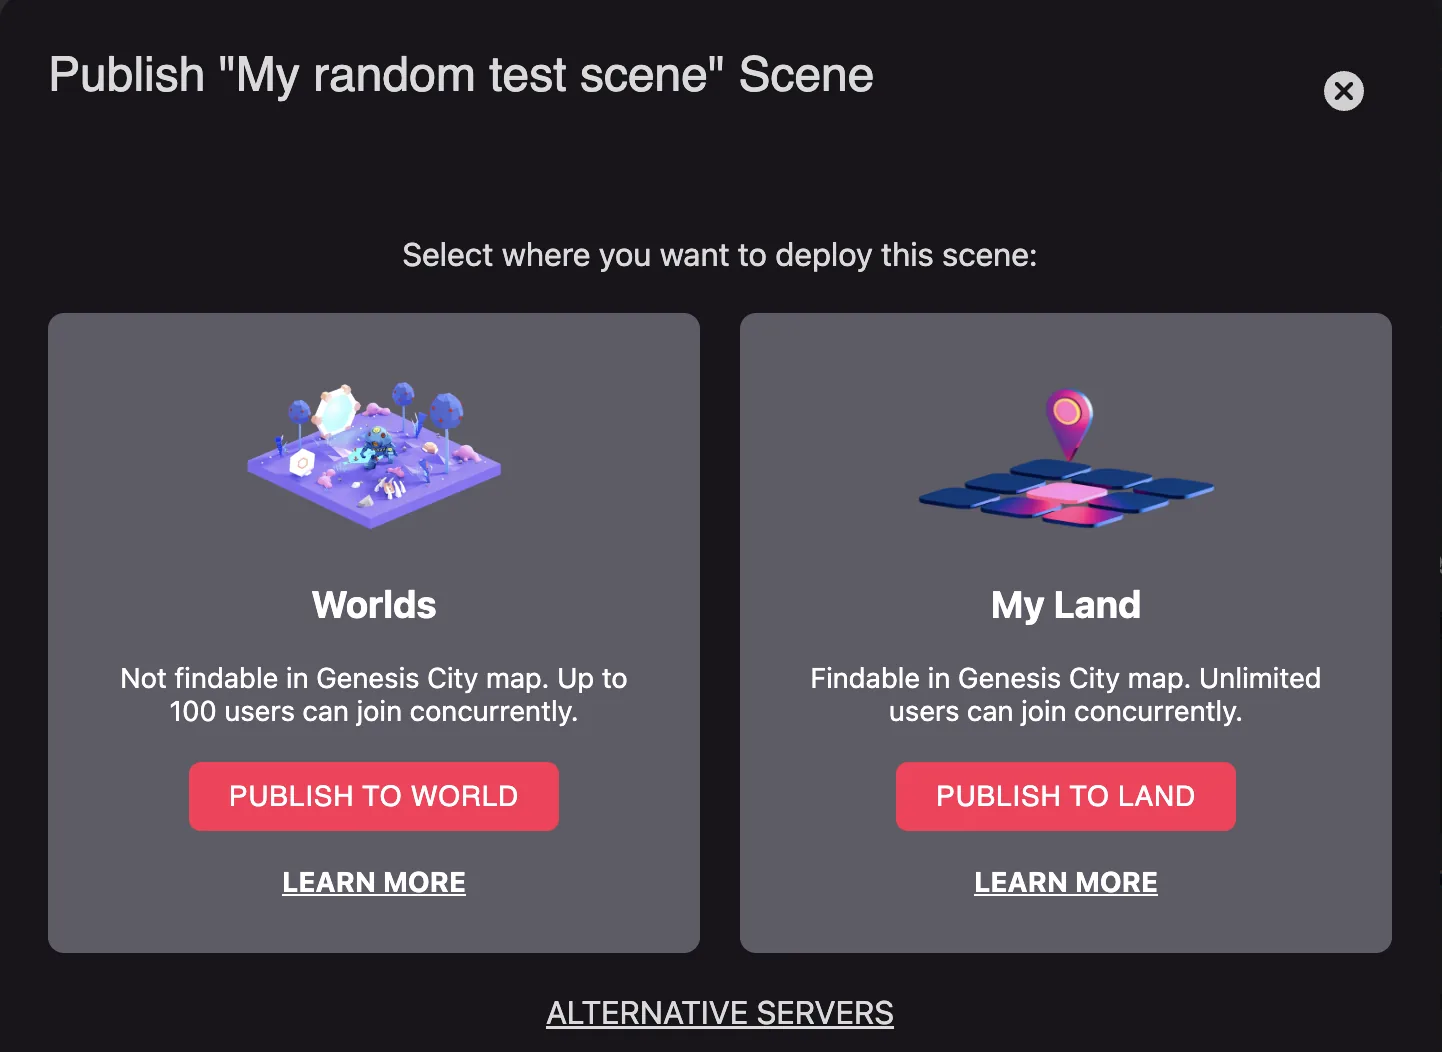
- If publishing to LAND, select the location on the map. You'll see your eligible parcels marked in red. If publishing to a WORLD, you'll see your eligible NAMEs in a dropdown.
💡 Tip: If you don't see your parcels or NAMEs, make sure you're connected to the Creator Hub using the right user account. Otherwise exit the project and click the user settings icon on the top-right corner, then select Sign Out and sign back in again.
- The next screen shows all of the files you're currently uploading and their sizes, confirm the operation.
- The publication process will then start. It has two stages, and once both are done a Jump In button appears.
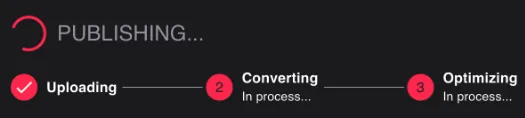
📔 Note: The two stages of the deployment involve:
- 1. Uploading: Uploading the files to the servers.
- 2. Converting: The scene's 3D models are compressed into Asset Bundles for faster rendering. This usually takes seconds. It may take longer for very large scenes.
Decentraland's servers also generate Low Level of Detail (LOD) versions of your models, used to draw your scene from far away. That runs in the background once your scene is already live, so publishing never waits for it.
How long does publishing take?
- Until you can test it: seconds to a couple of minutes. It scales with the total size of your scene and your upload bandwidth. The Jump In button appears as soon as the scene is playable, once both stages are done.
- Before a live event: publish your final version at least an hour before the event starts, to leave room for anything unexpected.
The following factors can make a publication slower:
- Total scene size: affects both the upload and the conversion.
- The number and complexity of distinct 3D models: models are converted one by one.
- How busy the conversion servers are: your scene may be queued behind other scenes published at around the same time.
Managing Worlds
The Creator Hub enables World management via the Manage tab in its main panel. The Manage tab allows World tracking and editing. From here, you can edit World Settings, Permissions, and Scenes.
World storage budget
Scenes published to Worlds count against a storage budget that is shared across all the Worlds owned by your wallet. The budget grows with your holdings: each Decentraland NAME or LAND parcel you own grants 100 MB, and every 2,000 MANA held in your wallet grants an additional 100 MB. Worlds published to ENS domains have a fixed limit of 36 MB instead.
The Manage tab shows how much of your storage budget you're using. Click View Details to see how your MANA, LAND, and NAME holdings add up.
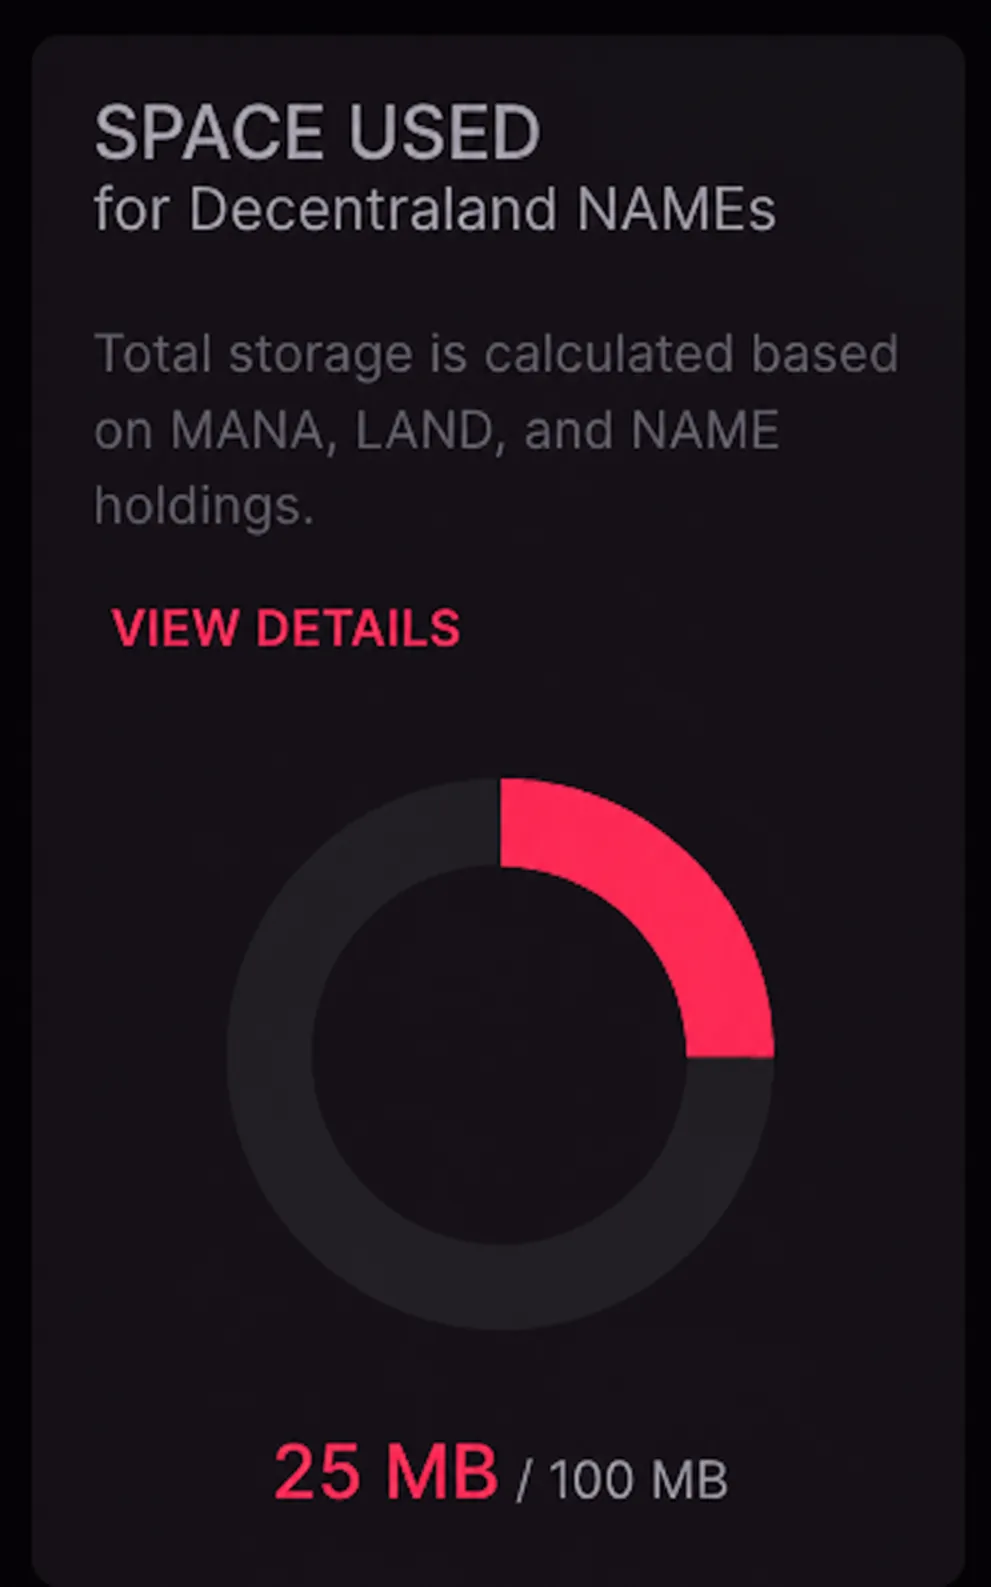
You can also check your remaining budget in the Worlds tab of the Builder.
See Worlds size limits for details on how the budget is calculated and what happens if you exceed it.
World Settings
A World Owner can edit its settings by going into the desired World Settings under the Manage panel, or by accessing it during the publishing process by clicking on Settings if Multi-Scene World (Advanced) is enabled.
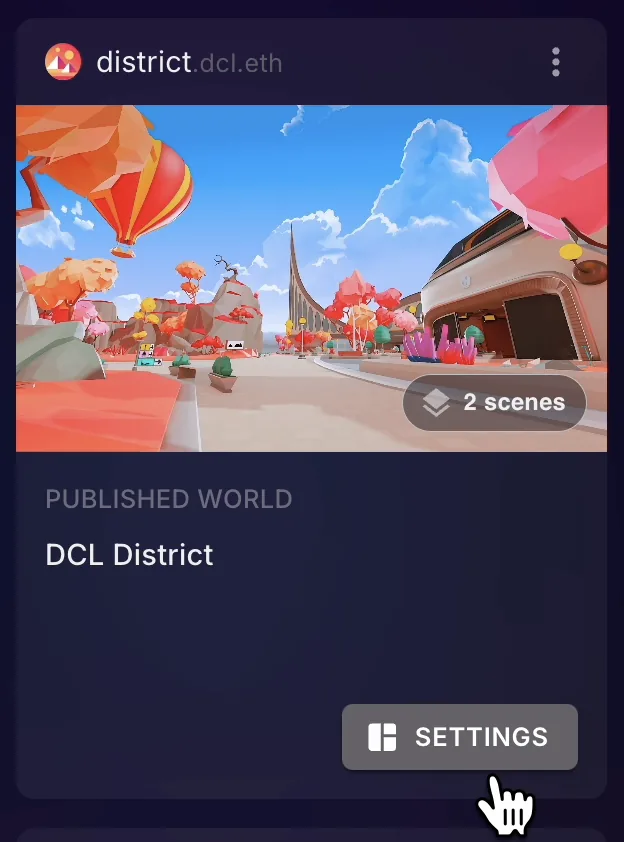
- Details: World's general information:
- World Title
- Description
- Content Rating
- Categories
The information added in Details will be shown in Decentraland Places and in the in-world World information once it is published. Keep in mind that if the World contains a single scene, these details are overwritten by the scene's metadata on every publish. See World metadata vs scene metadata below.
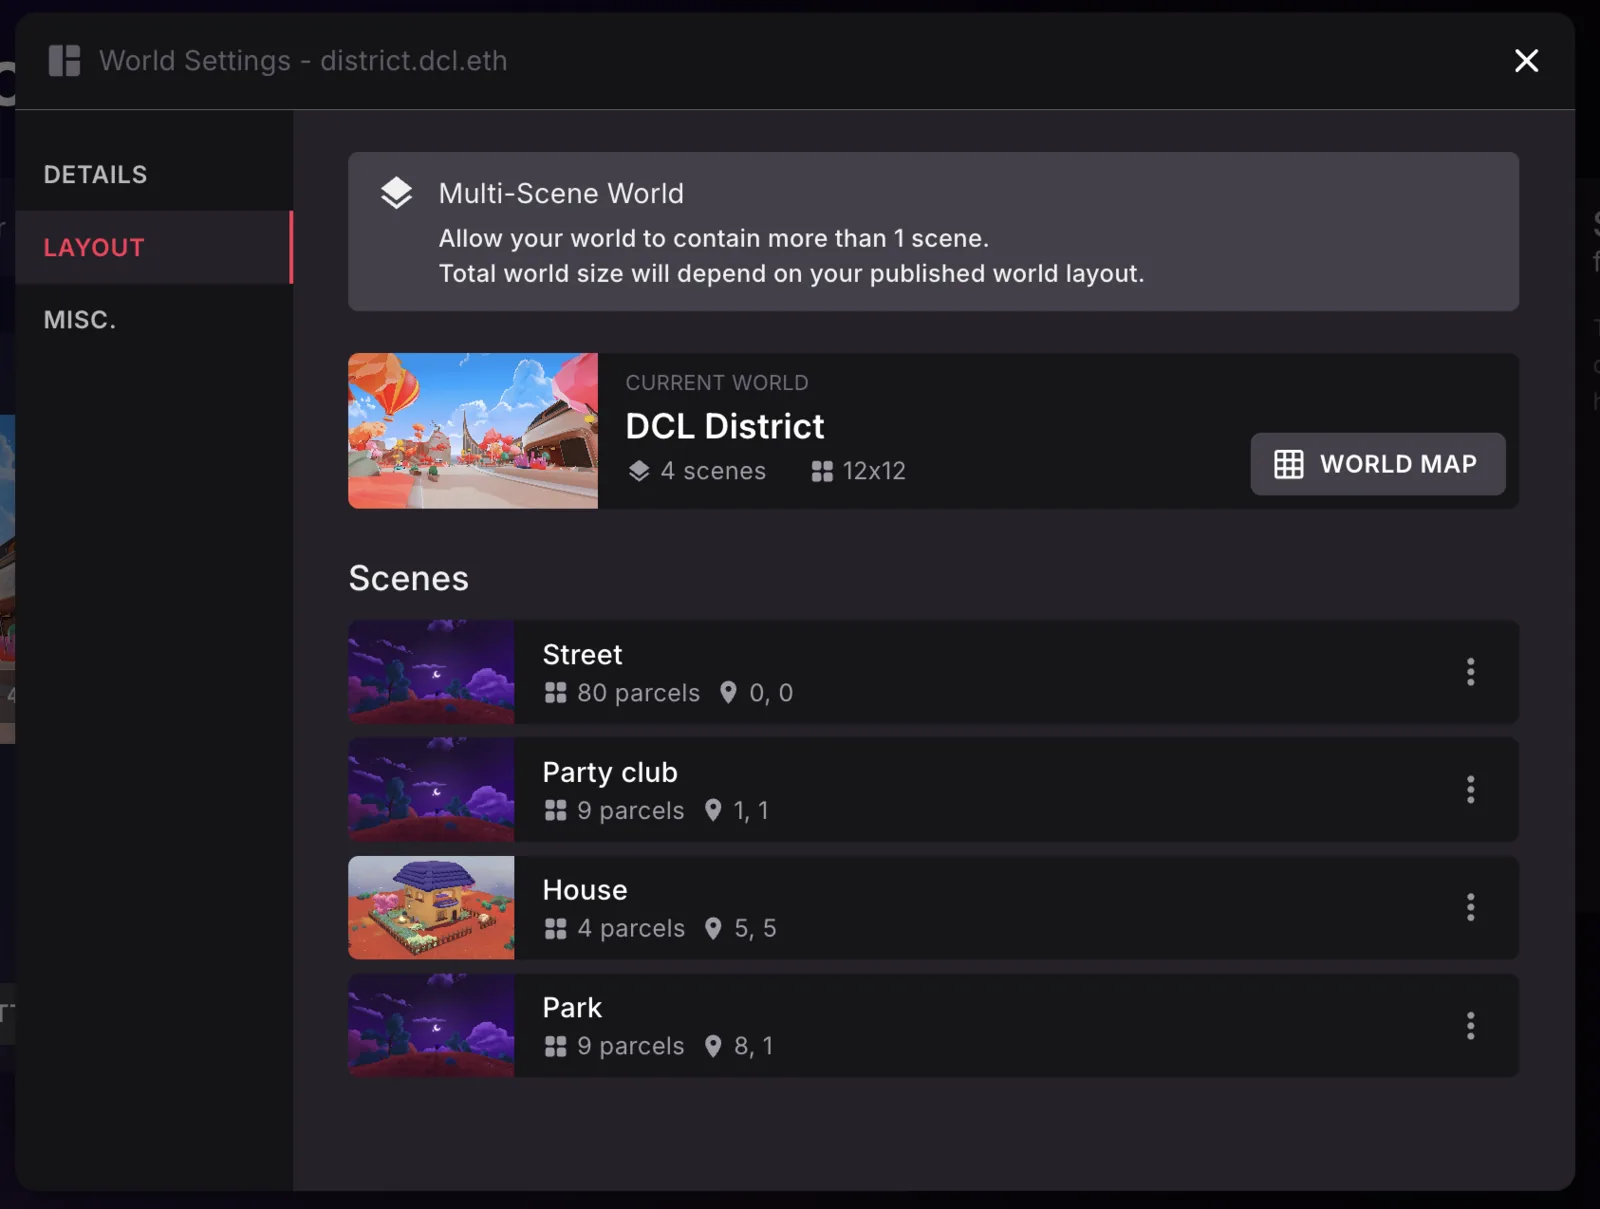
- Layout: Only accessible in Multi-Scene Worlds. Contains information about all the World's published scenes.
- Remove individual scenes by clicking the three dots and selecting Remove from World.
- World Map shows the World layout and identifies parcels with content and the remaining free parcels.
- Misc: Other useful World configurations:
- World Spawn Coordinate: This sets up the Parcel (X,Y) in which the user will spawn inside the World. The scene located in that Parcel determines the exact position the user will spawn (for example, Parcel 1,1 is the World Spawn, and the scene in 1,1 has a Spawn point of 1,0,1 inside that scene).
- Skybox settings
📔 Note: World Settings are only accessible to the World Owner (the address that minted the NAME). For more details about how to obtain a NAME, check the Marketplace NAMEs section.
World metadata vs scene metadata
A World and each scene published to it have two separate sets of metadata. Both include a name, a description, and a thumbnail:
- Scene metadata: Belongs to the scene project, stored in its
scene.jsonfile. You edit it via the scene settings in the Scene Editor, and it's uploaded together with the scene every time you publish. - World metadata: Belongs to the World itself. You edit it in the World's Settings, in the Manage tab of the Creator Hub. This is the information shown in Decentraland Places and in the in-world World information.
How these two relate depends on how many scenes the World contains:
- Empty World: When you publish a scene to an empty World, the World's metadata is filled in from the scene's metadata.
- Single-scene World: Every time you publish the scene, the World's metadata is updated to match the scene's metadata.
- Multi-scene World: The World's metadata is fully independent from the metadata of each of its scenes. Publishing a scene never changes the World's metadata. The only way to change it is through the World's Settings in the Manage tab.
In practice, if your World contains a single scene, you don't need to think of the World's metadata as a separate thing: just edit your scene's settings and publish, and the World will always reflect them.
📔 Note: In a single-scene World, any changes you make to the World's Settings in the Manage tab will be overwritten by the scene's metadata the next time you publish the scene. To make those changes stick, edit the scene's settings instead.
In a Multi-Scene World, the World's Settings in the Manage tab is the only place to edit the World's metadata.
Multi-Scene Worlds
A World can have multiple scenes, published by the World Owner or by other creators. This enables a collaborative environment where each parcel can be managed by different Collaborators.
Making a World Multi-Scene
A World Owner can choose to make the World Multi-Scene by toggling Multi-Scene World (Advanced) when publishing to a single-scene World.
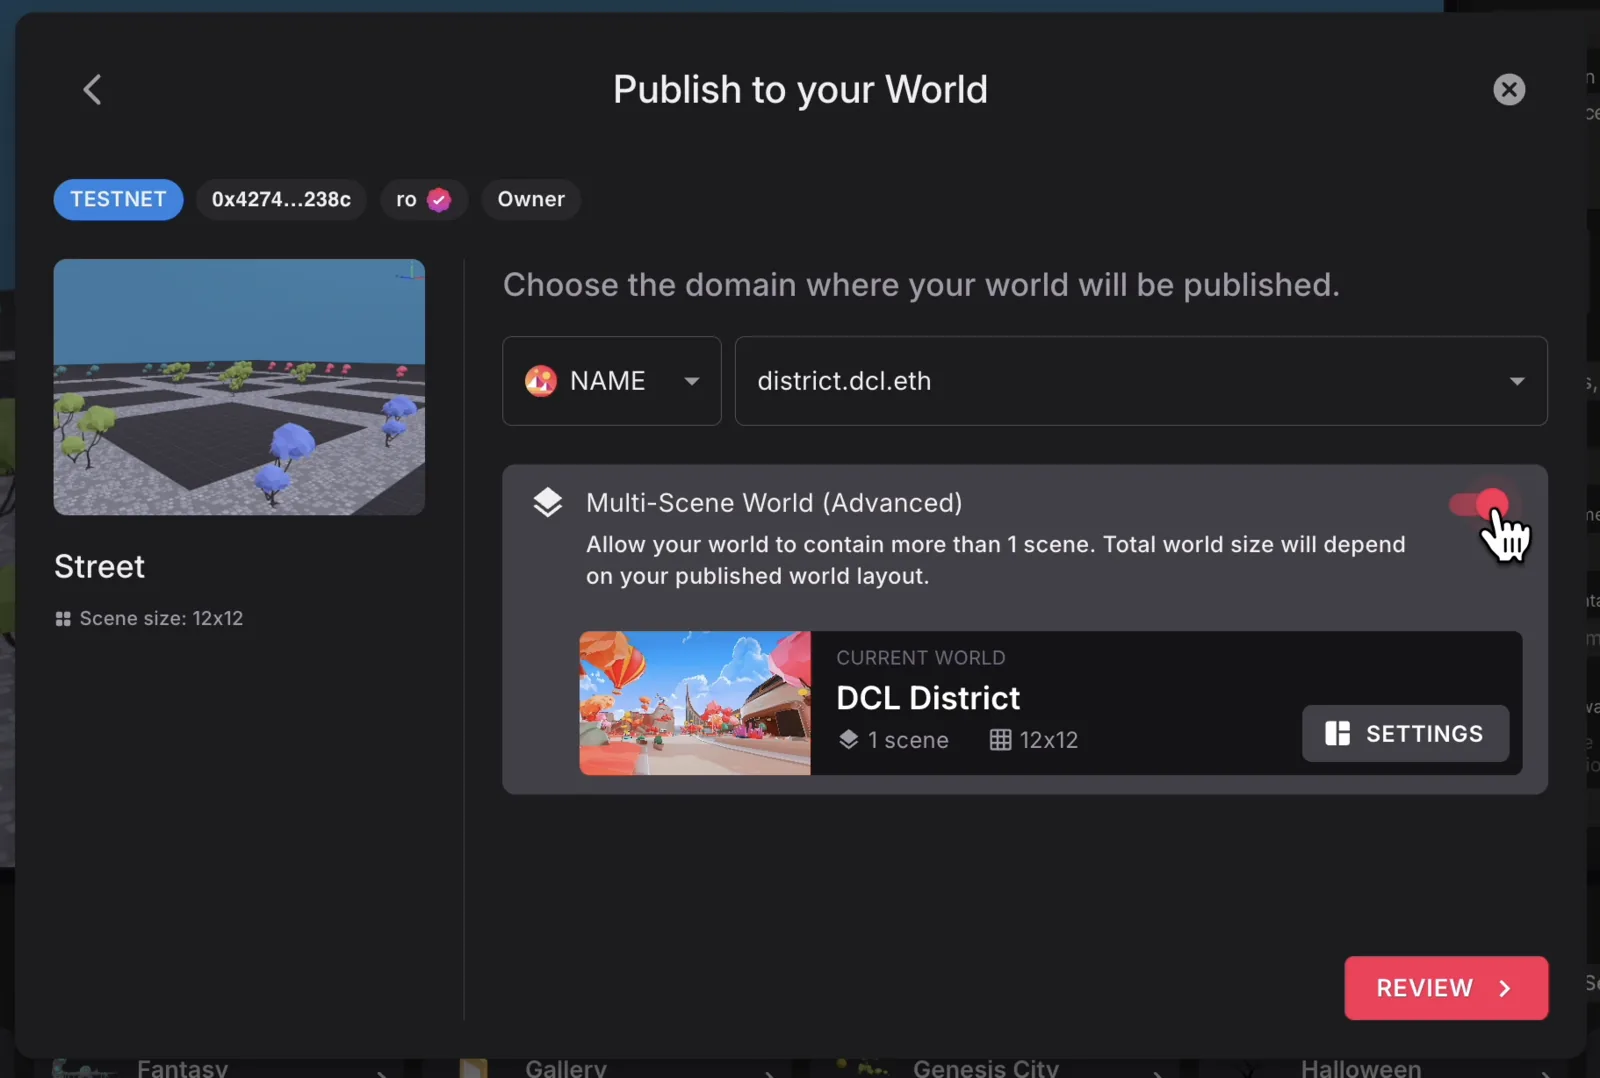
Once the Multi-Scene World is published, the World Owner can publish additional scenes or add Collaborators to publish within the World.
📔 Note: A Multi-Scene world size adapts automatically to contain all the published scenes, growing and shrinking dynamically on each publish. The space left between different scenes in the Multi-World is filled with environment.
Adding Collaborators to a Multi-Scene World
In the Manage panel, a World Owner can access the World's Permissions by clicking on the three dots. The World Owner can manage collaborators under the Collaborators tab.
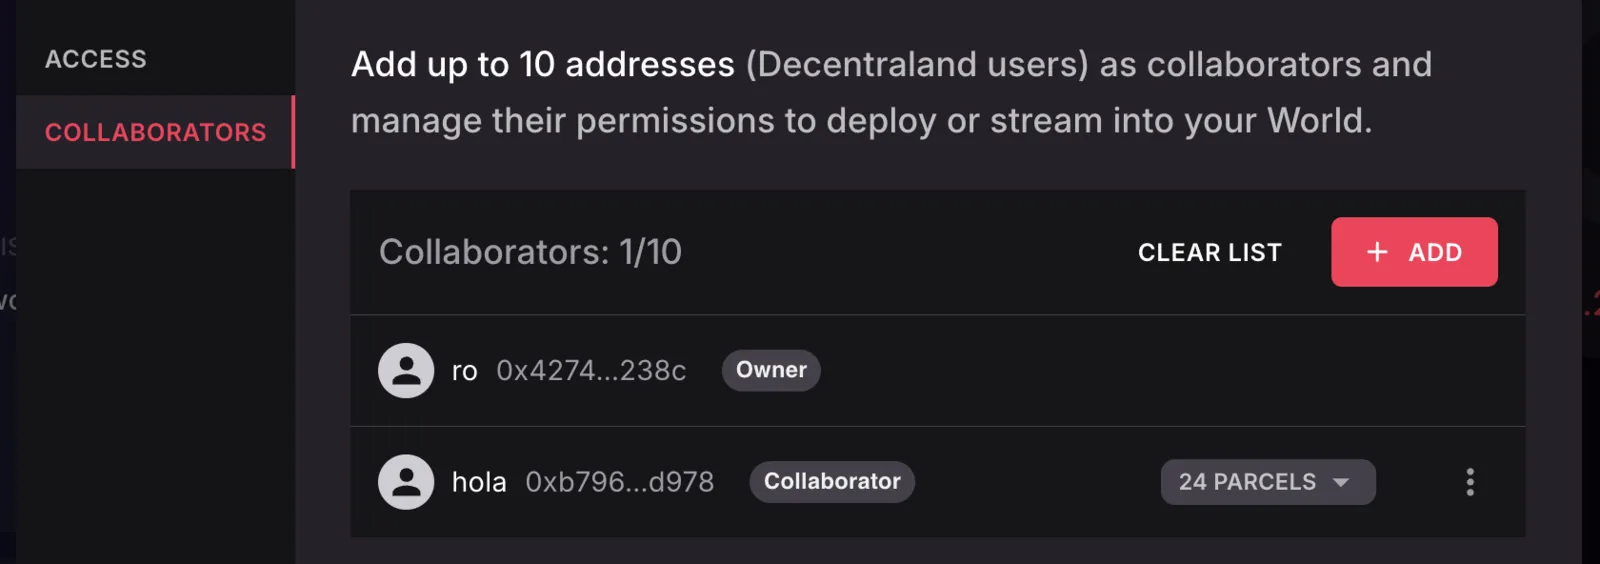
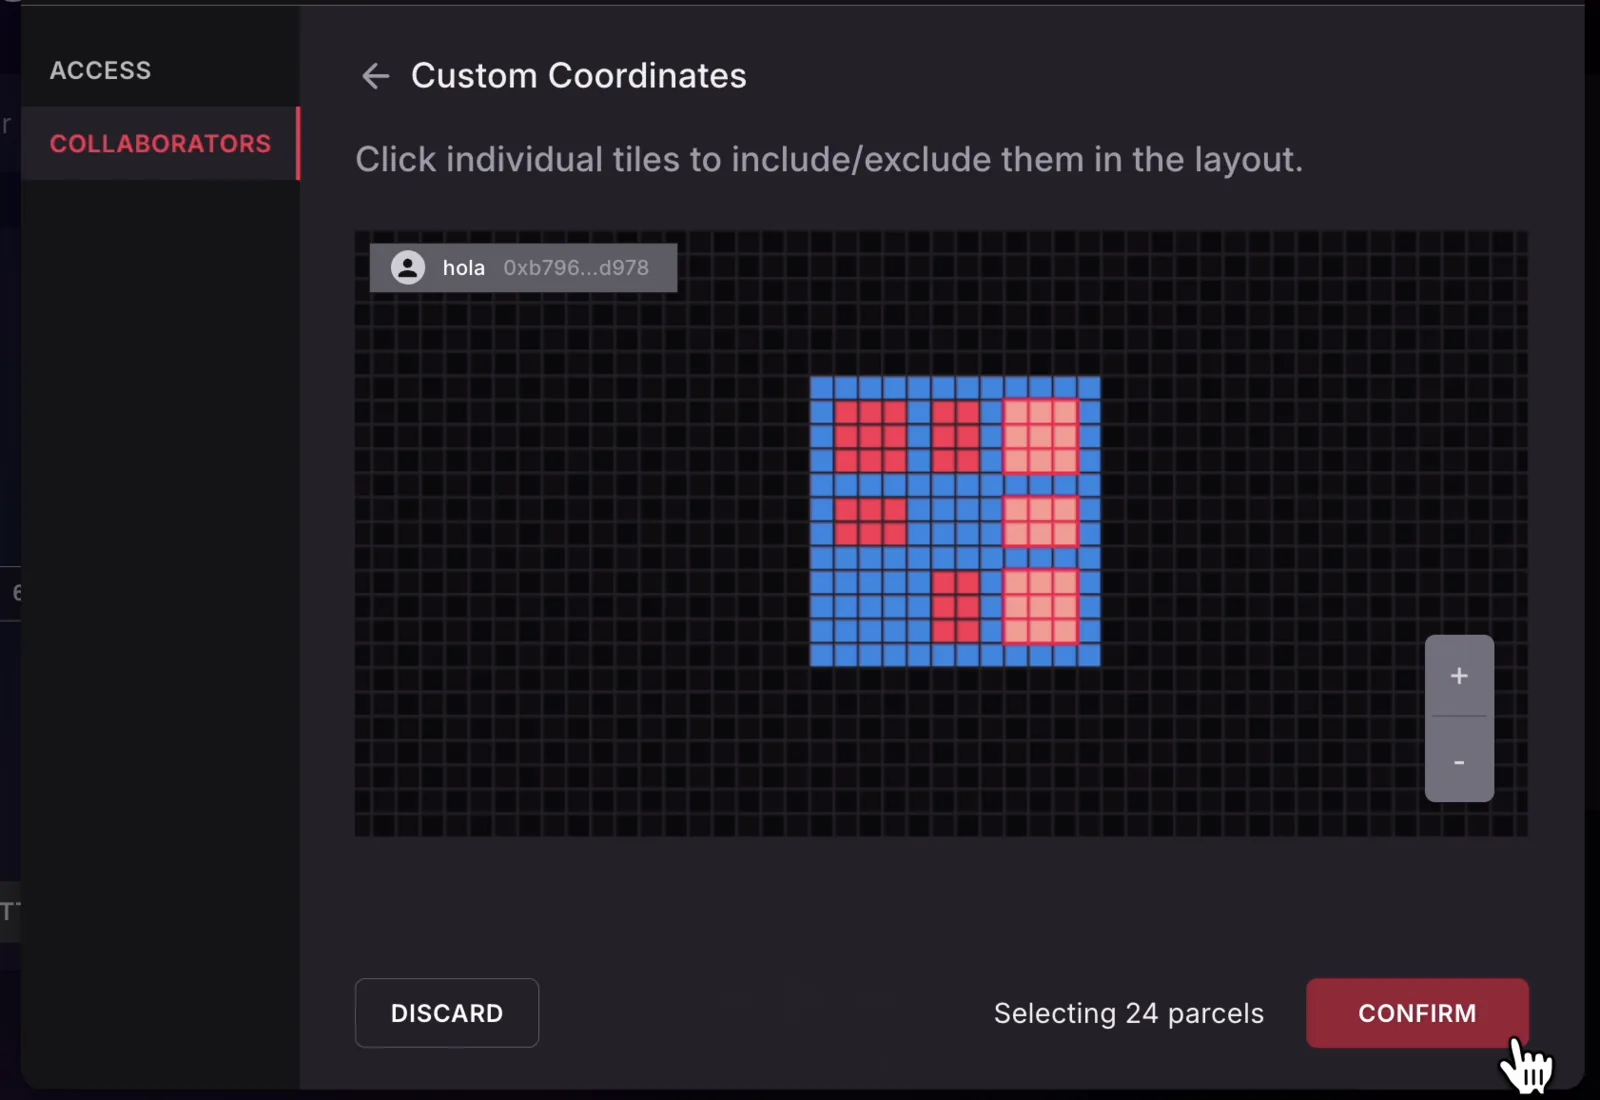
A Collaborator can have deploy rights to All Parcels or to specific Custom Coordinates. Custom Coordinates can be selected and confirmed through an interactive World map, similar to the one in the World Settings.
Deploying to a Multi-Scene World as a Collaborator
World Collaborators cannot edit its Settings or Permissions. In the Manage tab, a creator can see the World they are a Collaborator in but cannot access Settings or Permissions.
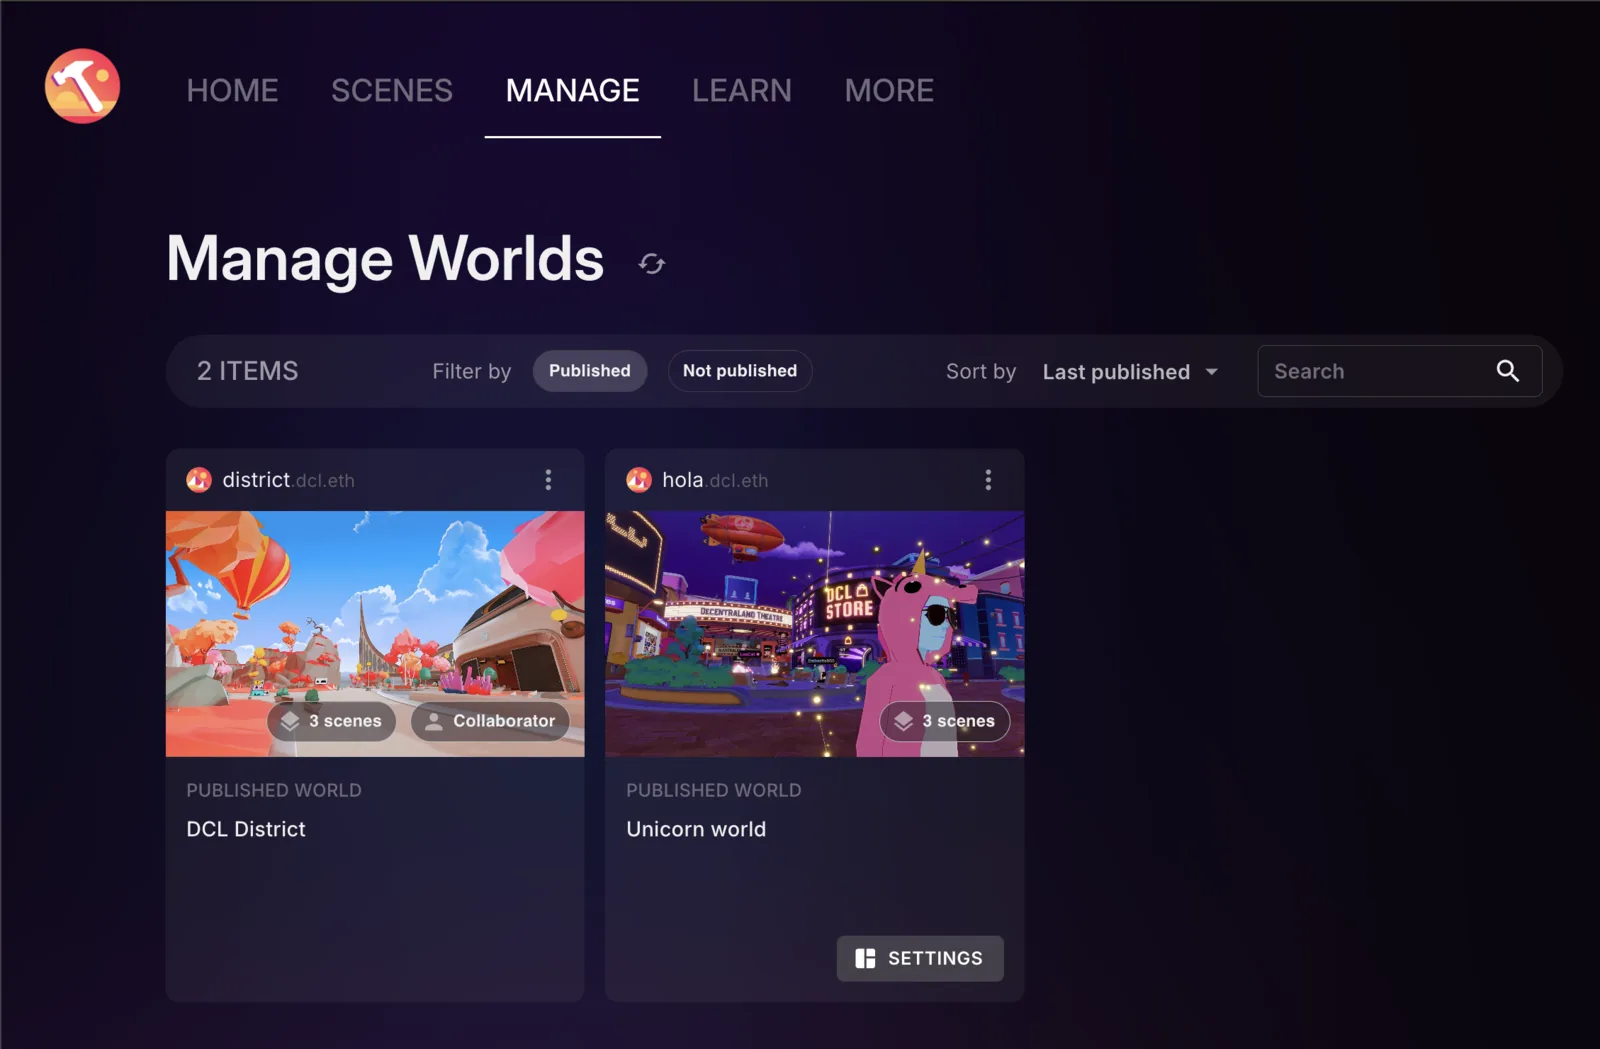
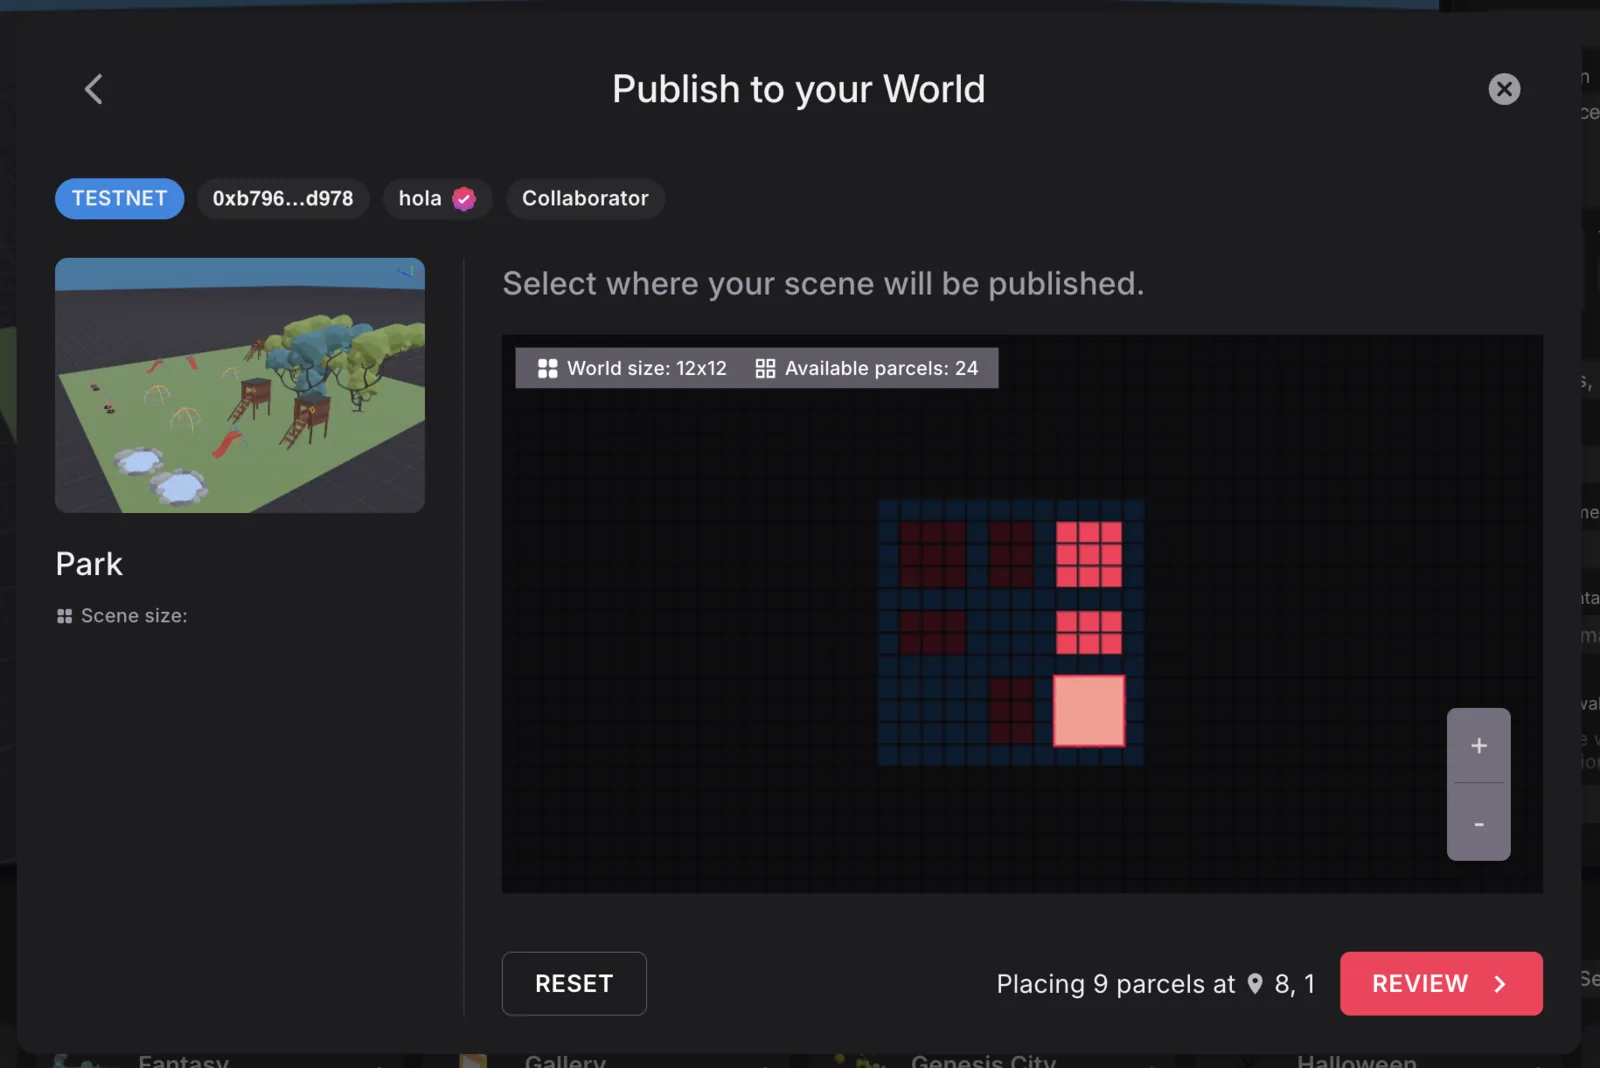
When going through the publishing process, the creator can select to publish only to the parcels they are a Collaborator in (as set by the World Owner).
In the Collaborators section, if the World Owner set Custom Coordinates for the creator, only the assigned parcels will be available for publishing. If access was set to All Parcels, the creator will be able to select any parcel in the World to publish their scene.
📔 Note: Collaborators with All Parcels publishing access can overwrite any scene from the world, even if it was published by the owner or other collaborators.
Private Worlds
A WORLD can have different Access settings. It can be accessible to anyone, or be restricted in different ways.
Setting the Access of a WORLD
In the Manage panel, a World Owner can access the World's Permissions by clicking on the three dots. The World Owner can manage access restrictions under the Access tab.
Access Types
A World Owner can choose between three types of World Access:
Public
Anyone can access the World. This is the default setting of a World.
Password Protected
Only users with the password can enter the World.
Passwords must be at least 8 characters long and contain at least 2 numbers. Once created, the password won't be accessible, so make sure to keep a copy.
Invitation Only
Only addresses and Communities added in the Approved Addresses can access the World.
To add new addresses or communities to the Approved Addresses, follow these steps:
Click on the + New Invite button.
You can add addresses in three different ways:
Wallet Address: Add individual wallets, one at a time.
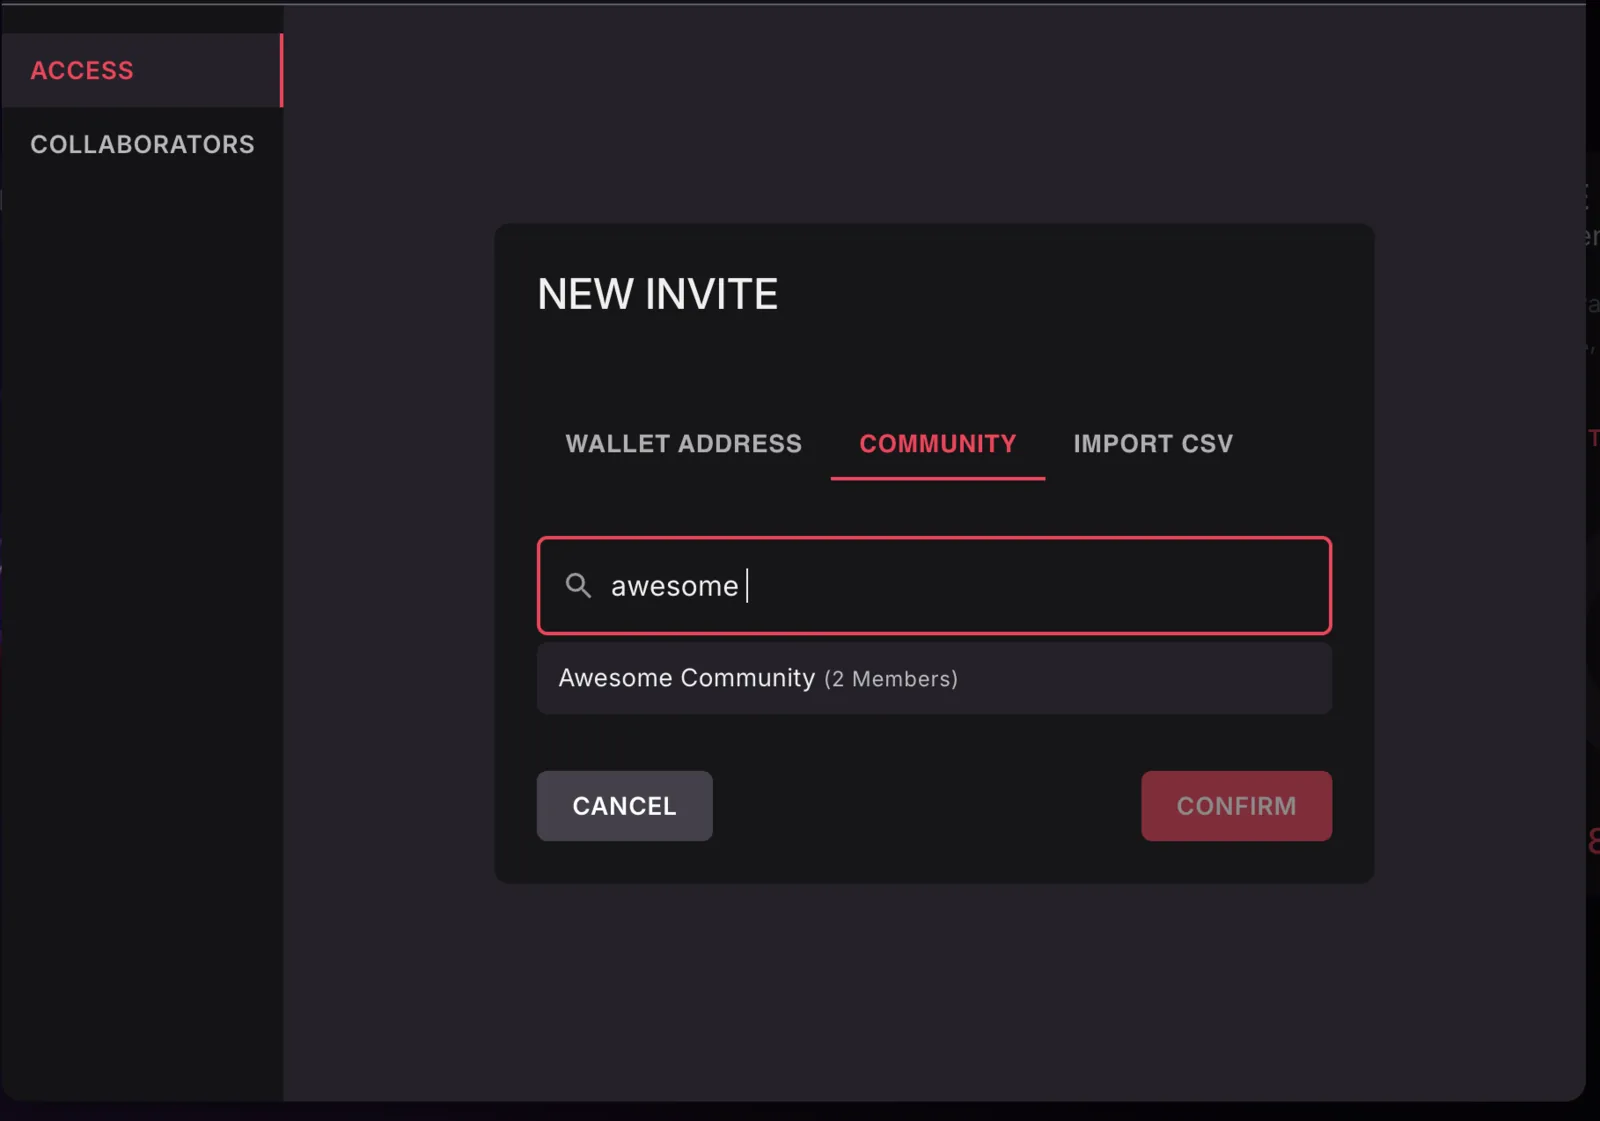
Community: Search and add any Public Community. This adds all Community addresses to the Addresses Approved.
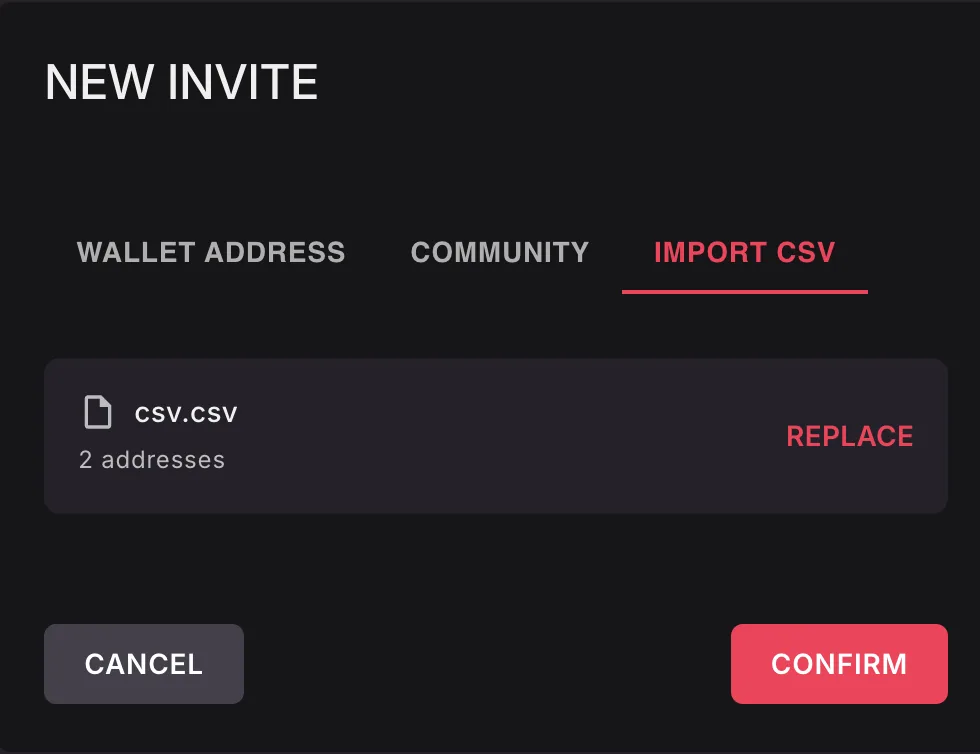
Import CSV: Use an existing CSV with a list of addresses or community IDs to add to Approved Addresses. The structure is one wallet per line, for example:
0x3bA7fD92eC4a1F6B8d2E9c5A7b1D3f6C8e4A2d9F
0xA1c9E4b7D2f6C8a3B5e9F1d4A7c2E6b8D3f9C5a1
Once imported, it tracks each Address individually, as shown in the image.
After confirming, the address/es are in the Approved Addresses.
With a new + New Invite, addresses are added to the existing list, helping the World Owner manage and extend the list if needed.
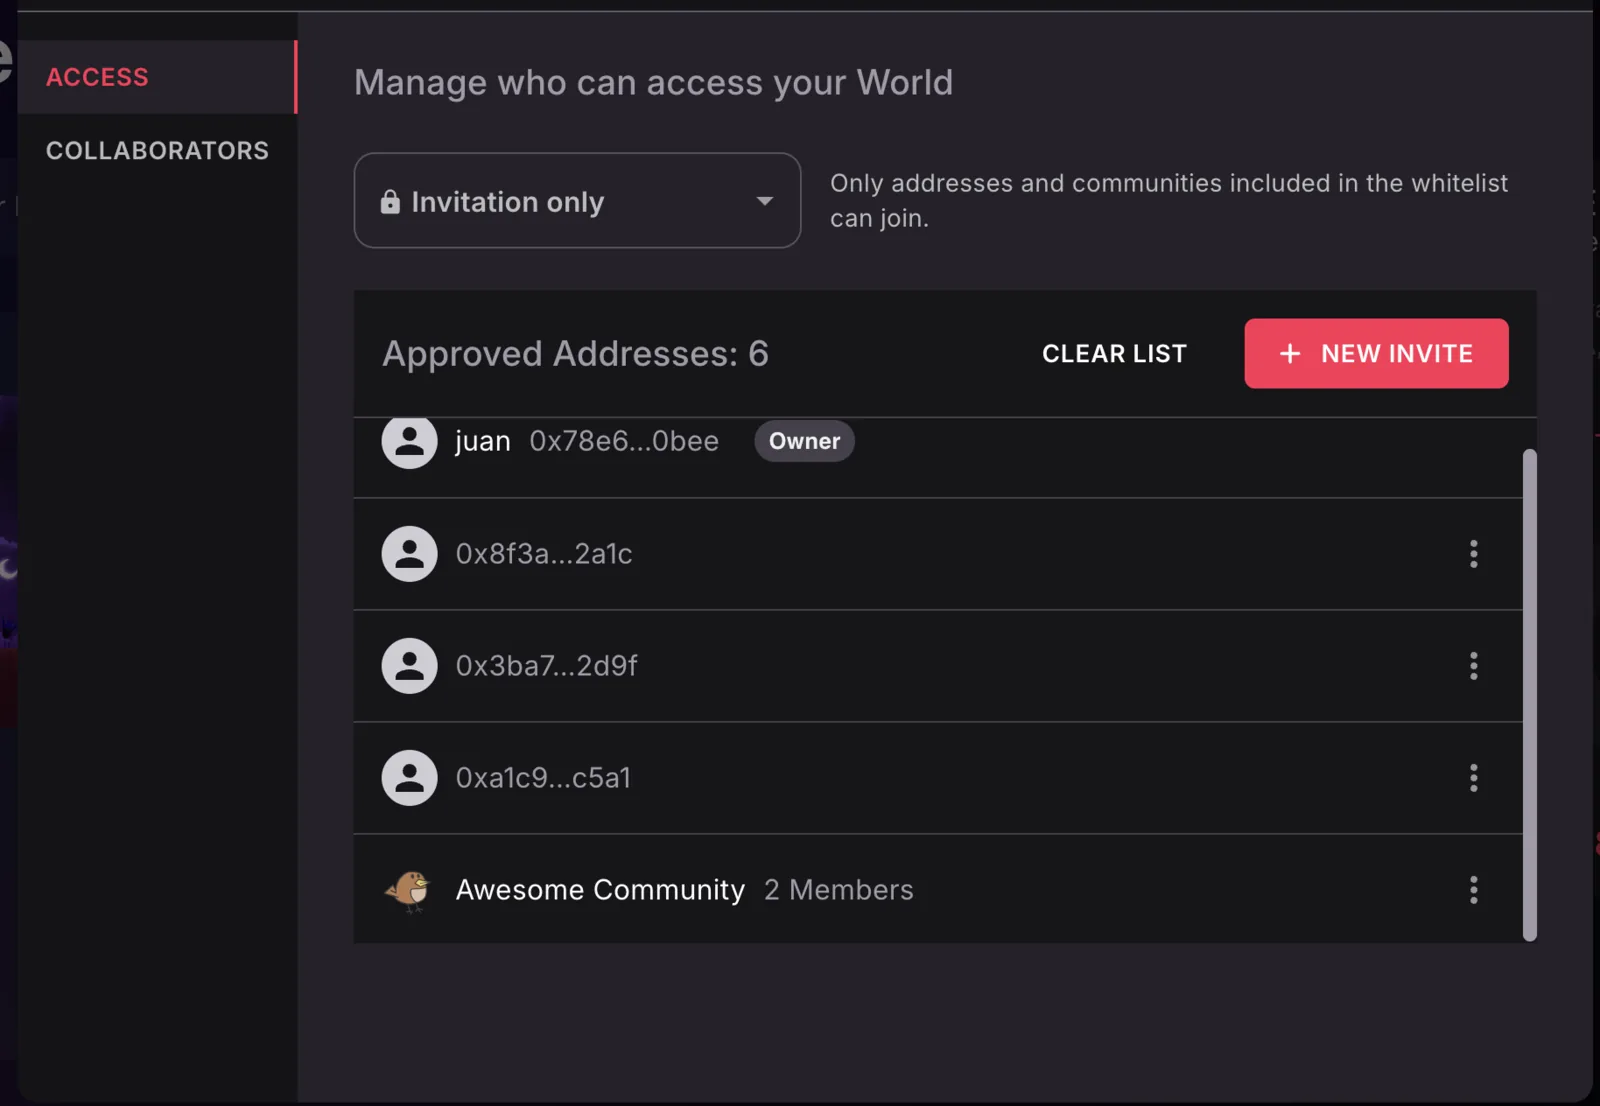
- Individual Addresses or set of Addresses (in case of a Community) can be removed by selecting Delete on the three dots in the Approved Addresses section.
📔 Note: If you change the Access type from Invitation Only, your Approved Addresses list will be removed. Make sure to have a copy in case you need it in the future.
Jumping into Private Worlds
There are different scenarios if a user jumps into a World that doesn't have Public access:
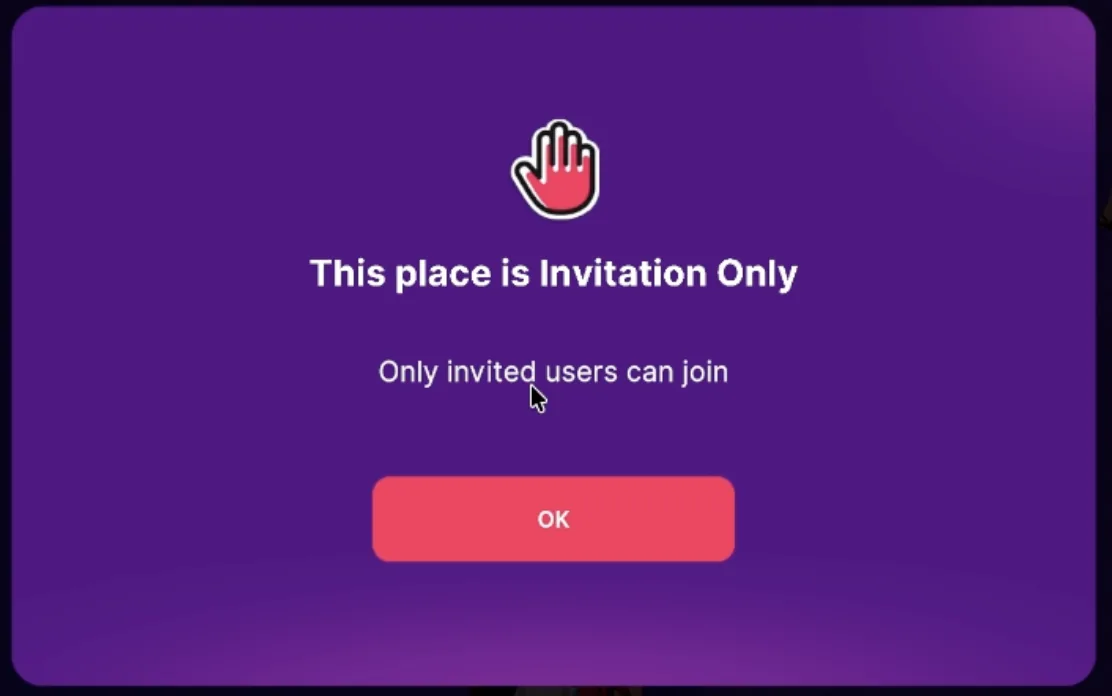
- Their address in the Approved Addresses: Will be able to join normally. If not, they will get information that the World is Invitation Only.
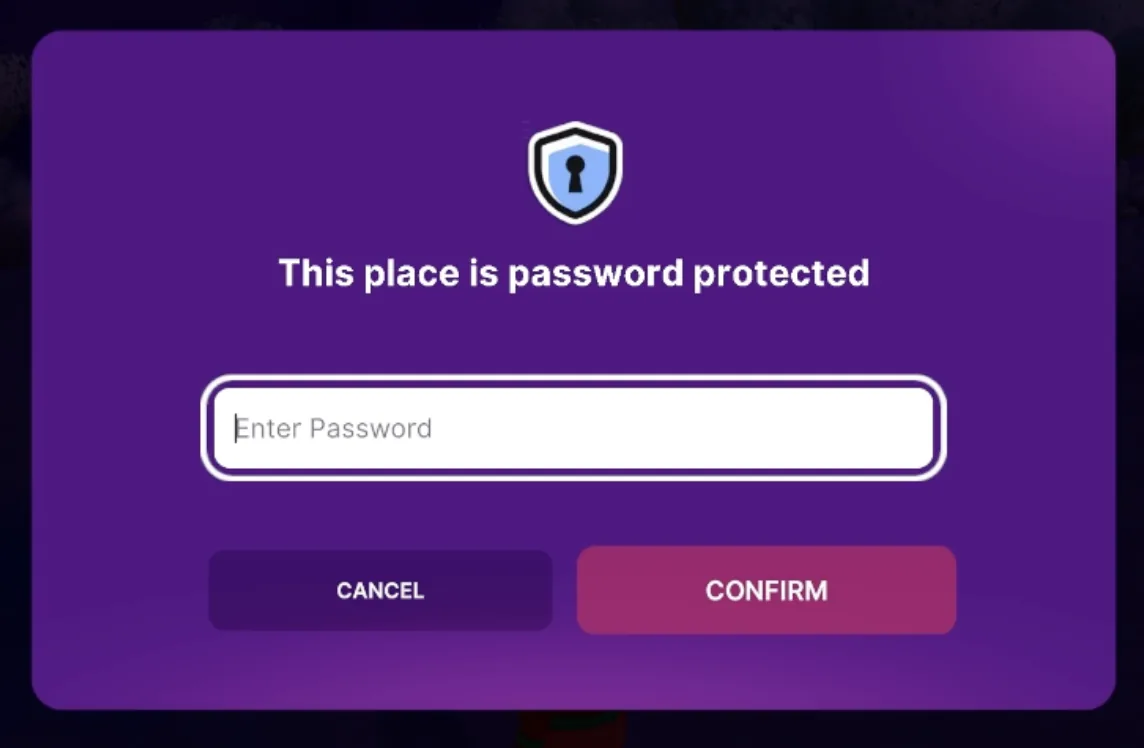
- The World is Password Protected: Users will be able to write the password. The maximum limit is ten (10) attempts.
Publish from a hardware wallet
Instead of storing your LAND tokens in a Metamask account, you may find it more secure to store them in a hardware wallet device, such as a Ledger or a Trezor, that's physically plugged in to your computer.
If you're using one of these devices, you can link the hardware wallet to Metamask to enable signing messages, while keeping the tokens more secure. See this article from Metamask for instructions to connect your account.
Once your hardware wallet can be used via Metamask, you can deploy following the same steps as if your tokens were on a Metamask account.
Scene overwriting
When a new scene is deployed, it overwrites older content that existed on the parcels it occupies.
Publishing normally starts right away. If you're about to replace content that already exists in a World, the Creator Hub asks you to confirm first, and offers a Don't show again option.
If a scene that takes up multiple parcels is only partially overwritten by another, all of its parcels are either overwritten or erased.
Suppose you deployed your scene A over two parcels [100, 100] and [100, 101]. Then you sell parcel [100, 101] to a user who owns adjacent land and that deploys a large scene (B) to several parcels, including [100, 101].
Your scene A can't be partially rendered in just one parcel, so [100, 100] won't display any content. You must build a new version of scene A that only takes up one parcel and deploy it to only parcel [100, 100].
Publish to granted land
If you're publishing to land owned by the Decentraland Foundation that was granted to you via a grant, click the Publish button normally, then select Publish to a different server on the bottom. Then select Custom Server from the dropdown and enter the following server address: https://linker-server.decentraland.org.
📔 Note: You must first manually set the coordinates of your scene in the advanced tab of the Layout settings. See Scene Settings for more info.
Custom servers
You can deploy content to a custom server that doesn't belong to the official DAO-maintained network of catalyst servers. To do this, you don't need to own any LAND or NAME tokens, as you can configure the server to use any validation logic you prefer to control who can deploy where. Custom servers can chose to have content from the official servers, that you can overwrite, or start from a blank slate and publish entirely new content.
To publish to a custom server, click the Publish button normally, then select Publish to a different server on the bottom. Then select Custom Server from the dropdown and enter the address of the server.
See How to run your own Catalyst Node for more info on what you can do with your own server and how to set it up.
📔 Note: Players will need to manually type in a URL to access your custom server. Certain validations from services like the rewards server might fail in these contexts, as often these services require that the request comes from an official server.
Players are never directed to this server, the only way to access it is to explicitly type in the URL to connect to it.
Verify deployment success
Once you deployed your scene, these changes can take a few minutes to be uploaded and processed. If you enter Decentraland right after deploying, you might briefly still see the previous version of your content.
The Creator Hub displays the progress of the publication as it moves through the Uploading and Converting stages, and shows a Jump In button as soon as the scene is playable.
Check the conversion status
While the 3D models of a new version are being converted, players are deliberately served the last fully-working version of your scene. Conversions should take a couple of minutes tops, if they take longer it could be a sign something failed.
You can query the conversion status directly in a browser:
https://asset-bundle-registry.decentraland.org/entities/status/<pointer>: replace<pointer>with one of your scene's coordinates (for example20,-34) or with the entity ID of the deployment. The response shows the conversion status for each platform underassetBundles, and the status of the LODs underlods. Whencompleteistrue, the scene is fully converted for all platforms. For a scene in a World, add the World's name as a query parameter, for example.../entities/status/0,0?world_name=myname.dcl.eth.https://asset-bundle-registry.decentraland.org/queues/status: lists the IDs of all the scenes currently waiting to be converted, per platform. If your entity ID appears here, your scene is queued behind other conversions and you just need to wait a little longer.
📔 Note: If you have an open session of the Decentraland explorer where you already loaded your scene, you'll need to close and re-open the app. Otherwise you'll keep seeing the cached version.