'/%3e%3cpath%20fill-rule='evenodd'%20clip-rule='evenodd'%20d='M18%2080.9996C25.515%2086.6471%2034.875%2089.9996%2045%2089.9996C55.125%2089.9996%2064.485%2086.6471%2072%2080.9996H18Z'%20fill='%23FF2D55'/%3e%3cpath%20fill-rule='evenodd'%20clip-rule='evenodd'%20d='M9.00008%2071.9996C11.5651%2075.3971%2014.6026%2078.4346%2018.0001%2080.9996H72C75.3975%2078.4346%2078.435%2075.3971%2081%2071.9996H9.00008Z'%20fill='%23FFA25A'/%3e%3cpath%20fill-rule='evenodd'%20clip-rule='evenodd'%20d='M60.3675%2062.9997H3.75757C5.15257%2066.2172%206.93007%2069.2322%209.00006%2071.9997H60.39V62.9997H60.3675Z'%20fill='%23FFC95B'/%3e%3cpath%20fill-rule='evenodd'%20clip-rule='evenodd'%20d='M31.8826%2029.2496V62.9996H60.0075L31.8826%2029.2496Z'%20fill='url(%23paint1_linear_1_49380)'/%3e%3cpath%20fill-rule='evenodd'%20clip-rule='evenodd'%20d='M3.75757%2062.9997H31.8826V29.2497L3.75757%2062.9997Z'%20fill='white'/%3e%3cpath%20fill-rule='evenodd'%20clip-rule='evenodd'%20d='M60.3675%2047.25V72H81L60.3675%2047.25Z'%20fill='url(%23paint2_linear_1_49380)'/%3e%3cpath%20fill-rule='evenodd'%20clip-rule='evenodd'%20d='M39.7574%2072H60.3674V47.25L39.7574%2072Z'%20fill='white'/%3e%3cpath%20fill-rule='evenodd'%20clip-rule='evenodd'%20d='M60.3675%2040.4997C66.5807%2040.4997%2071.6175%2035.4629%2071.6175%2029.2497C71.6175%2023.0365%2066.5807%2017.9997%2060.3675%2017.9997C54.1543%2017.9997%2049.1175%2023.0365%2049.1175%2029.2497C49.1175%2035.4629%2054.1543%2040.4997%2060.3675%2040.4997Z'%20fill='%23FFC95B'/%3e%3cpath%20fill-rule='evenodd'%20clip-rule='evenodd'%20d='M31.8824%2022.4997C34.989%2022.4997%2037.5074%2019.9813%2037.5074%2016.8747C37.5074%2013.7681%2034.989%2011.2497%2031.8824%2011.2497C28.7758%2011.2497%2026.2574%2013.7681%2026.2574%2016.8747C26.2574%2019.9813%2028.7758%2022.4997%2031.8824%2022.4997Z'%20fill='%23FFC95B'/%3e%3cdefs%3e%3clinearGradient%20id='paint0_linear_1_49380'%20x1='45'%20y1='-18.6396'%20x2='-18.6396'%20y2='45'%20gradientUnits='userSpaceOnUse'%3e%3cstop%20stop-color='%23FF2D55'/%3e%3cstop%20offset='1'%20stop-color='%23FFBC5B'/%3e%3c/linearGradient%3e%3clinearGradient%20id='paint1_linear_1_49380'%20x1='31.8731'%20y1='29.2497'%20x2='31.8731'%20y2='62.9996'%20gradientUnits='userSpaceOnUse'%3e%3cstop%20stop-color='%23A524B3'/%3e%3cstop%20offset='1'%20stop-color='%23FF2D55'/%3e%3c/linearGradient%3e%3clinearGradient%20id='paint2_linear_1_49380'%20x1='60.3605'%20y1='47.25'%20x2='60.3605'%20y2='72'%20gradientUnits='userSpaceOnUse'%3e%3cstop%20stop-color='%23A524B3'/%3e%3cstop%20offset='1'%20stop-color='%23FF2D55'/%3e%3c/linearGradient%3e%3c/defs%3e%3c/svg%3e)
Smart Items - Basic
Using smart items in your scene to add interactivity.
Some of the items in the catalog of the Scene Editor are Smart Items. Players can interact with these, they have configurable properties, and they can trigger actions on other smart items. For example: doors that can be opened and closed, platforms that move up and down, or buttons and levers that can activate other items.
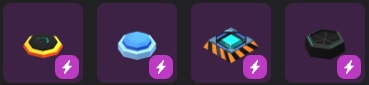
You can recognize these items in the asset pack explorer because they have a lightning icon and a different colored background.
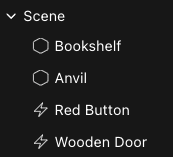
You can recognize which items in your scene are smart because they have the lightning icon next to them in the entity tree.
Using items
To use a smart item, drag it into the scene like any other item. All items include a default behavior, run a scene preview try it out.
Here are some common items and their default behaviors:
- Doors: Doors are opened or closed when clicked. You can change this behavior so they're opened by buttons, trigger areas, etc.
- Buttons: When clicked, they play sound and an animation as feedback. Add more actions to their trigger events to activate other smart items.
- Levers: When clicked, they switch between two states. Make each position of the lever perform different actions on other smart items.
- Chests: They behave like doors, by default are opened or closed when clicking. You can place smaller items inside them.
- Platforms: They move between two positions. Use their tween actions to control where they move to, their speed, etc.
- Trigger area: An invisible item that can trigger other smart items when the player walks into its area. See About trigger areas.
- Avatar Modifier Area: An invisible area that changes how avatars behave or appear inside it, for example hiding avatars or disabling passport popups. See Modifier Areas.
- Camera Modifier Area: An invisible area that forces the player's camera into first or third person while inside. See Modifier Areas.
- Video Player: A screen for showing videos or live streams. See Playing Videos.
- Audio Stream: Play audio from a live stream. See Playing Audio Streams
- NFT: Display an NFT image as a portrait. See Displaying NFTs
All smart items can be configured to behave in custom ways. For example how far a platform moves, or what a button activates.
Configure an item
Select an item in the Scene Editor to view all of its properties on the right.
Most smart items keep their behavior in a Script component. Their settings appear in the Script panel, one field per parameter, each with a tooltip explaining what it does. You don't need to write any code to use them.
Some typical fields you can find in many items are:
- Hover text: What text is displayed on the UI as a hint when the player passes their cursor over the item. For example a door might say "Open"
- Interaction: With what button is the item activated? On a typical keyboard:
- Primary is E
- Secondary is F
- Pointer is Mouse Left Button
- Action3 is key 1
- Action4 is key 2
- Action5 is key 3
- Action6 is key 4
- Hooks that react to the item: parameters where you pick an action to run at a particular moment. Which ones an item has depends on what it does. A button has onClick, a lever has onActivate and onDeactivate, a moving platform has onReachStart and onReachEnd, a bell has onRing. Leave a hook empty and nothing happens at that moment.
Each item has its own specific settings, that may vary from one item to another.
A few items keep the older Config panel instead. Lights, for example, still set their color and intensity there.
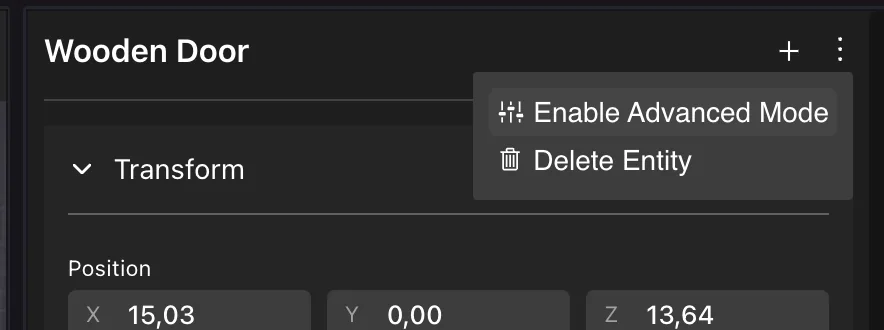
All items have an Advanced Mode that lets you configure almost anything about them. This includes things like what sounds are played, or in what direction a platform moves. You can also add custom actions that include all kinds of things, like teleporting the player, playing avatar animations, attaching an item to the player's hands, etc. You can also add conditional logic, to only activate something in certain scenarios. See Smart Items - Advanced.
Call an action on another item
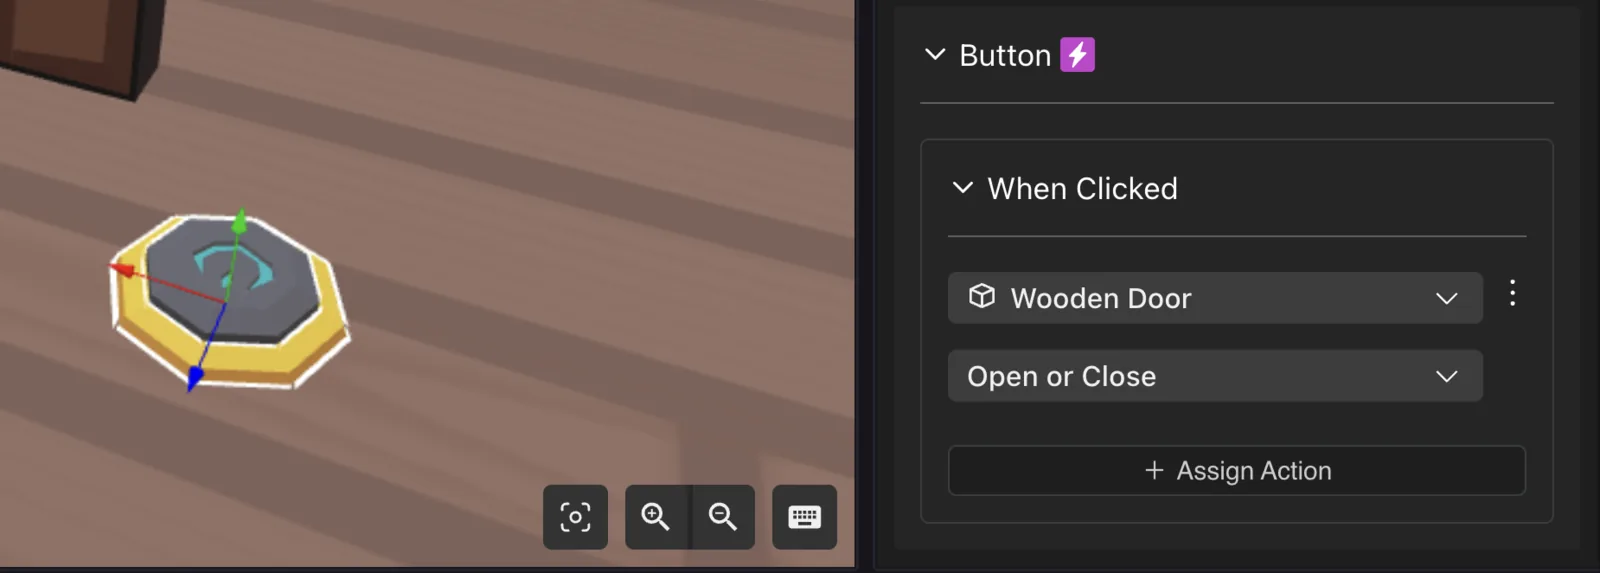
Smart items can trigger actions on other smart items, so that they happen every time the item is activated. Just select the item you want to call, from a list of all items in the scene, then select an action. Different items expose different actions.
For example here's a button that opens or closes a door. Each time the button is pressed, the door will either open or close.
Here's a lever that opens a door when activated, and closes that door when deactivated.
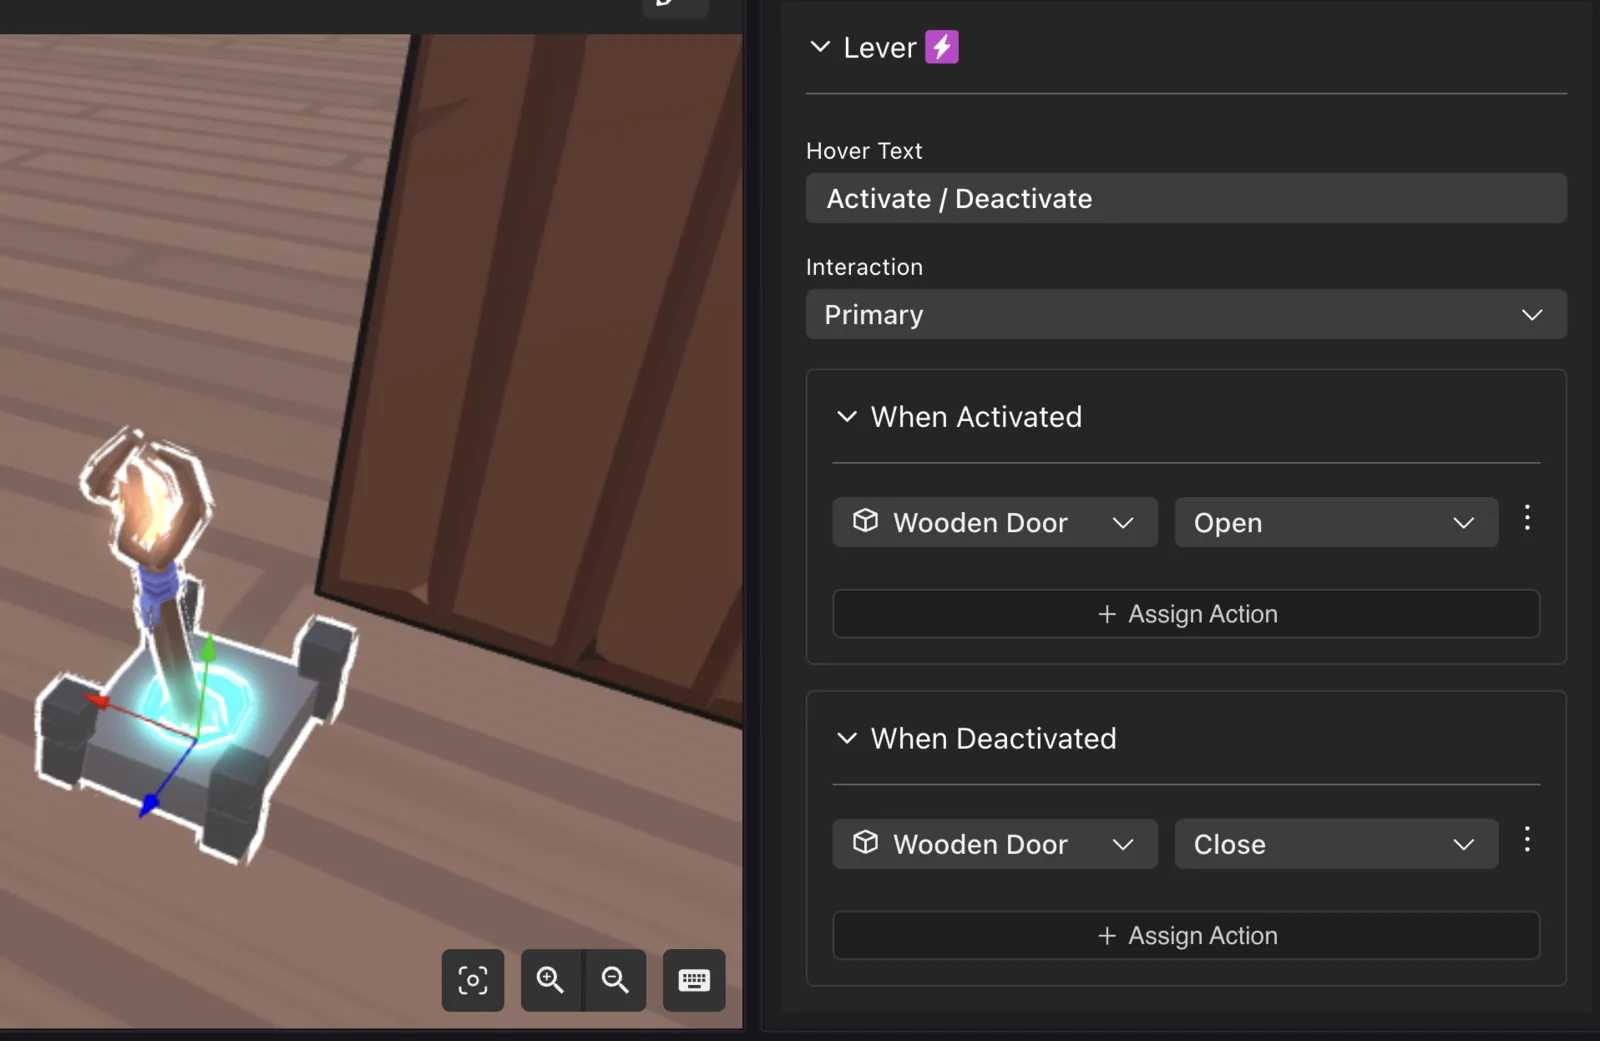
You can add as many different actions from different items to be triggered together. Just click + Assign Action.
Remove actions by clicking the three dots next to an action and selecting Remove action.
The actions an item exposes keep their familiar names, such as Open, Close, Sit Here, Turn On, or Teleport, so wiring between items works the same way it always has.
You can also chain actions. For example, if a lever's onActivate opens a door, and that door's own hook triggers something else, the lever sets off the whole chain indirectly.
If you use the Advanced mode you can also add conditional logic to these kinds of actions.
Special smart items
Some smart items have unique characteristics that make them very handy for common scenarios:
Trigger areas
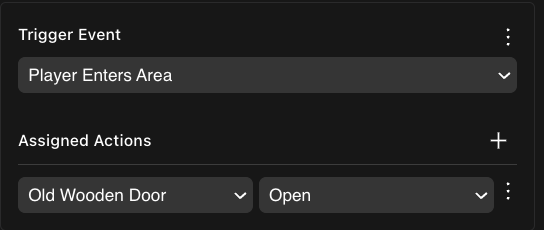
Use the Trigger Area smart item to trigger an action when the player walks into an area.
Use the Player Enters Area and Player Leaves Area trigger types on the item's Triggers components. The actions on these trigger events are activated every time that the player enters or leaves the area.
See Trigger area for more info.
Invisible walls
A collection of invisible shapes that can block players from walking through or clicking through an area.
These invisible walls can be useful when importing a 3D model that doesn't have a collider mesh, or when you want to create a wall that is not visible to the player.
See Colliders for more info.
Click area
An invisible cube that can be clicked by players to trigger actions on any other smart items. This item can be enabled or disabled by any other smart item, when disabled it won't be clickable. You can also set the text that players see when pointing their cursor at it.

Seats
Chairs, benches, and other seats let a player sit down by clicking them.
- A seat only frees up when the player who took it walks away from it, more than 1.5 meters.
- On an item with several spots, such as a bench, clicking it seats you on the nearest free spot.
- When every spot is taken, the hover text reads Seat is taken and clicking does nothing.
Teleports
The Teleport item sends the player somewhere else when they interact with it.
Set the x and y parameters to send them to a parcel in Genesis City. To send them to a World instead, fill in the world parameter with the world's name, such as myname.dcl.eth, and leave the coordinates empty.
📔 Note: There used to be a separate World Teleport item. It has been removed. Use the Teleport item with its world parameter instead.
Locomotion settings
The Locomotion Settings item changes how fast players move and how high they jump while they are inside your scene. Use it to make a scene feel floaty, to slow players down in a museum, or to speed them up across a large map.
Drag it anywhere into your scene. It applies its values when the scene starts, and its placeholder cube is only visible in the editor, never to players.
Each field is a slider, preset to Decentraland's default value:
| Field | Default | Range |
|---|---|---|
walkSpeed |
1.5 m/s | 0 to 10 |
jogSpeed |
8 m/s | 0 to 30 |
runSpeed |
10 m/s | 0 to 50 |
jumpHeight |
1 m | 0 to 10 |
runJumpHeight |
1.5 m | 0 to 10 |
doubleJumpHeight |
2 m | 0 to 15 |
glidingSpeed |
6 m/s | 0 to 30 |
glidingFallingSpeed |
1 m/s | 0 to 10 |
hardLandingCooldown |
0.75 s | 0 to 5 |
Jogging is the speed players move at by default. Walking and running are what they get by holding the control or shift keys.
The item also exposes two actions that other smart items can call:
apply: writes the current field values to the player again, for example after a trigger area or a button.restoreDefaults: clears your values, so the player goes back to Decentraland's defaults.
See Locomotion Settings and Restrictions for what each setting does in detail, and for how to change these values from code.
Playing videos
Play videos from either:
- Local files
- Stream from a URL
- Stream live from Decentraland Cast
- Stream live from RTMP Software (OBS, XSplit, StreamYard, etc.)
📔 Note: Playing videos is demanding on performance, so keep the number of videos playing at the same time low. The engine limits how many videos can play simultaneously based on each player's quality settings (1 on low, 5 on medium, 10 on high), and pauses any videos beyond that limit. See Play Videos.
See Play Videos for more info.
Playing audio streams
Play an audio stream from a URL, using the Audio Stream smart item.
📔 Note: Not all streaming services allow you to play their audio outside their site. The following are some examples that work in Decentraland:
GRAFFITI = 'https://n07.radiojar.com/2qm1fc5kb.m4a?1617129761=&rj-tok=AAABeIR7VqwAilDFeUM39SDjmw&rj-ttl=5'
SIGNS = 'https://edge.singsingmusic.net/MC2.mp3'
DELTA = 'https://cdn.instream.audio/:9069/stream?_=171cd6c2b6e'
JAZZ = 'https://live.vegascity.fm/radio/8010/the_flamingos.mp3'
You can adjust the volume of your stream. Note that the audio from the stream is not positional, it is heard at an even volume through all your scene.
Displaying NFTs
To display an NFT on a picture frame, use the NFT smart item. You must provide the following fields:
- Network
📔 Note: Currently ethereum is the only supported network.
- NFT Collection Contract: The smart contract for the NFT collection.
- Token ID: The token ID of this particular NFT collectible.
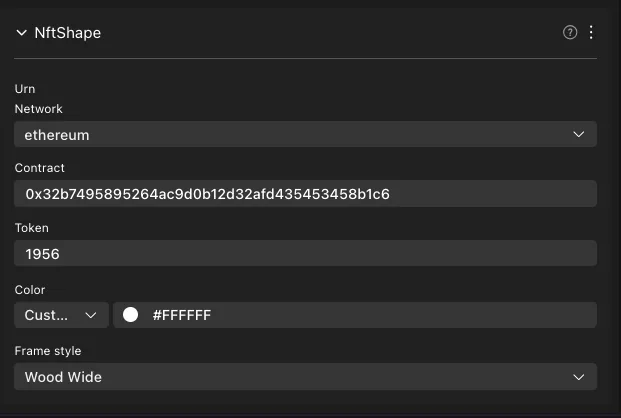
You can obtain this information from OpenSea, by checking the Details tab under the NFT image.
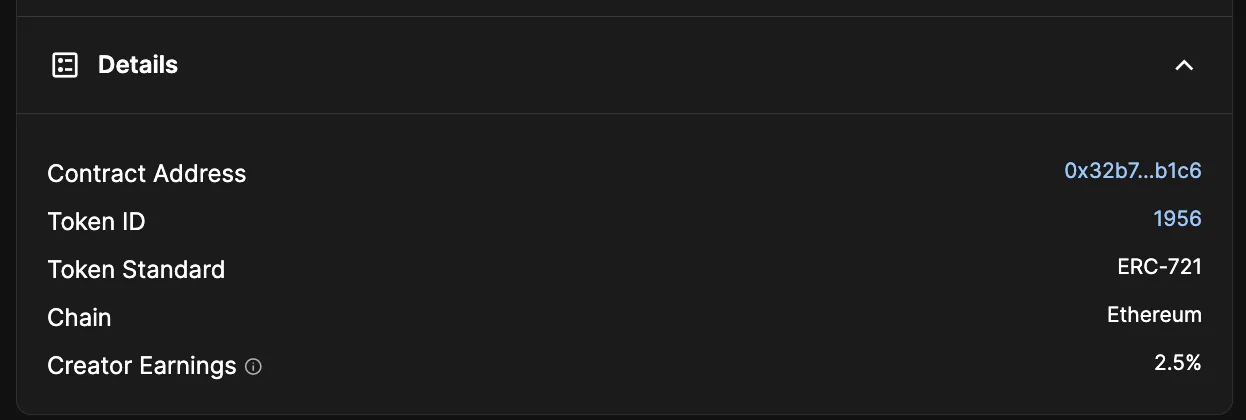
📔 Note: You can also obtain this information from the opensea URL. For example, if the NFT's URL is the following:
https://opensea.io/assets/ethereum/0x32b7495895264ac9d0b12d32afd435453458b1c6/1956
You can complete the fields with the following:
- Network: ethereum
- Contract: 0x32b7495895264ac9d0b12d32afd435453458b1c6
- Token: 1956
You can also configure a background color, this is particularly useful for NFTs with a transparent background.
You can also chose a Frame style, to frame the NFT in a variety of different styles, classic and modern.
See NFTs for more details.
Health bars
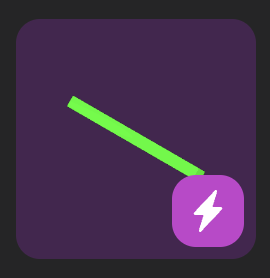
The Health Bar smart item is a great building block for several game mechanics. It can be used in various ways:
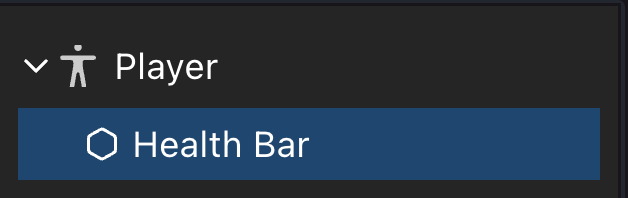
Nest it under the Player to display the player's health over the avatar
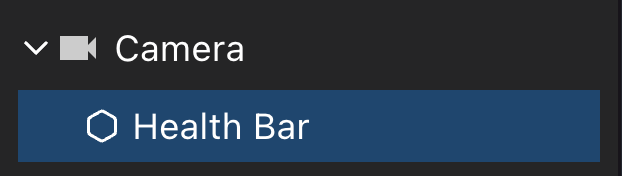
Nest it under the Camera to display it fixed on the UI
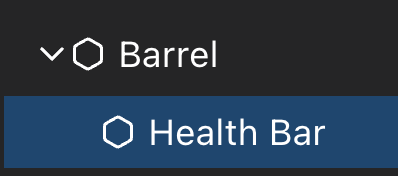
Nest it under literally any item in the scene to keep track of that item's health
Other items can interact with the health bar to add or subtract health from it.
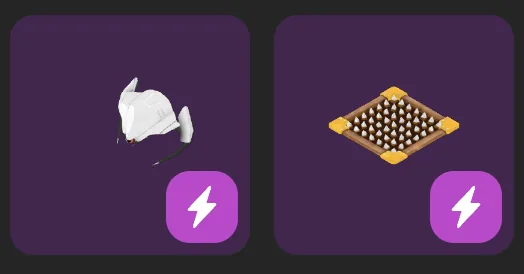
Items like the Spikes or Robot Enemy can lower health
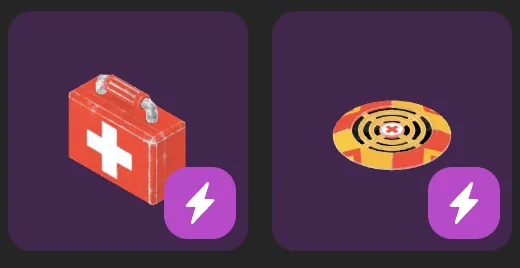
items like First Aid or the Healing Pad can restore it.
You must configure the Health Bar to define what will happen when the health equals 0. You might respawn the player to the position of a Respawn Pad smart item, reset the counter for their score, respawn any enemies, display a UI text, or whatever makes sense in your game logic.
You can also trigger actions when the health is lower than a certain value, for example play a special music or show a UI hint when health is less than 3.
Health bars can be configured to affect anything! For example, add a health bar nested under the Wooden Door smart item. This bar can have its health lowered by the player using the Sword smart item, but also from an explosion from the Barrel or the attack of the Robot Enemy. For this to work, configure the health bar so that it performs an action on its parent item when its value is 0.
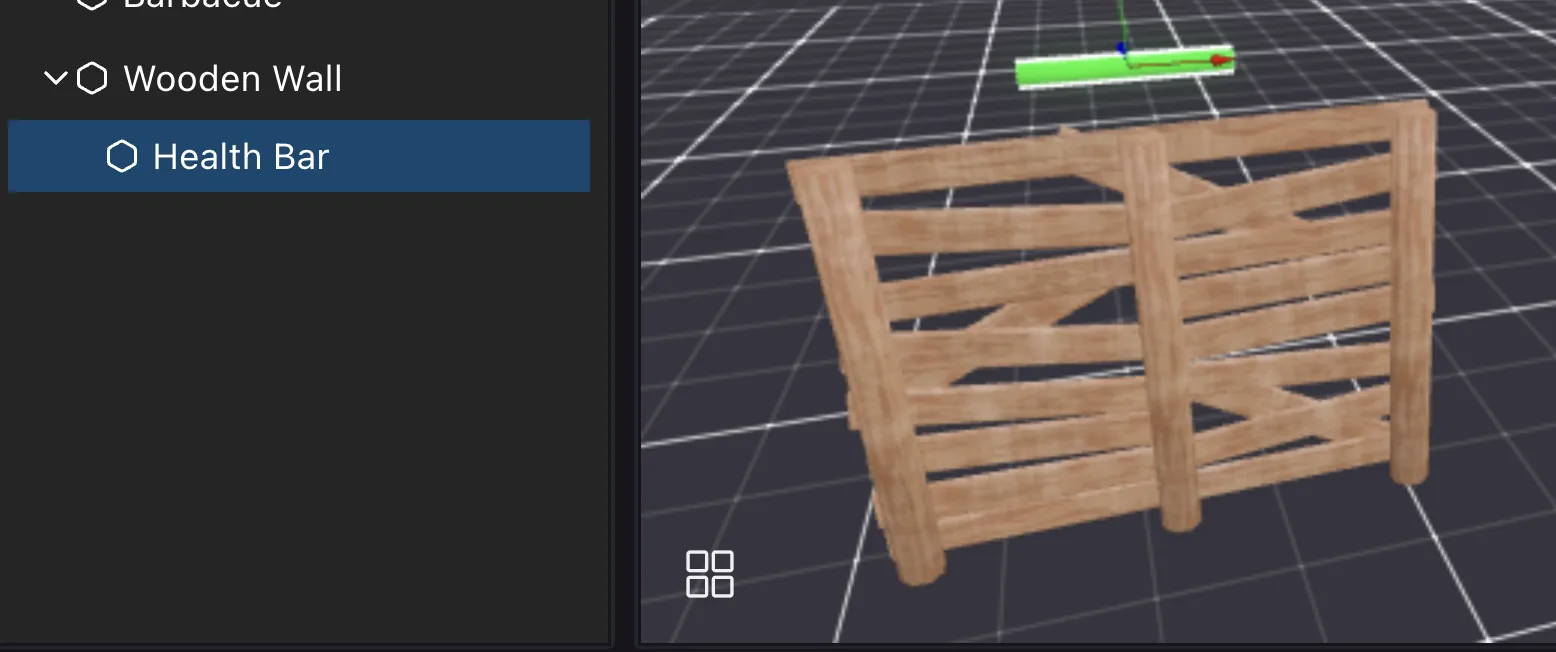
Weapons like the Sword can be picked up by the player, and then used to cause damage on any other item with a health bar that's near the player when performing the action.
Multiplayer
Almost all smart items have multiplayer behavior, so that all players in the scene share the same experience as the items change state. If player A opens a door, player B also sees that door open. If player C then walks into the scene while the other players are still there, she will see the door as already open too.
However, if there are no players near the scene, then the scene is restored to its default state. So if all players leave, but then player A comes back, she will find the door closed (if that was the default state of the door).
Make sure you design your scene so that the actions of one player don't sabotage the scene for others that come later. For example, if the scene is a puzzle game, you can use a delay action on a tools smart item to make all the items in the scene reset to their initial state a few seconds after the puzzle is solved.
You can also disable the multiplayer behavior of an item, see Smart Items - Advanced.
Troubleshooting
- An item in my scene should be clickable, but can't be clicked.
Make sure that it's not being obstructed by something else. You can't click through other items. Some items have a collider mesh that has a simplified geometry that may be obstructing your item, even though its visible shape doesn't seem to be doing it. Try moving the item to see what happens.