'/%3e%3cpath%20fill-rule='evenodd'%20clip-rule='evenodd'%20d='M18%2080.9996C25.515%2086.6471%2034.875%2089.9996%2045%2089.9996C55.125%2089.9996%2064.485%2086.6471%2072%2080.9996H18Z'%20fill='%23FF2D55'/%3e%3cpath%20fill-rule='evenodd'%20clip-rule='evenodd'%20d='M9.00008%2071.9996C11.5651%2075.3971%2014.6026%2078.4346%2018.0001%2080.9996H72C75.3975%2078.4346%2078.435%2075.3971%2081%2071.9996H9.00008Z'%20fill='%23FFA25A'/%3e%3cpath%20fill-rule='evenodd'%20clip-rule='evenodd'%20d='M60.3675%2062.9997H3.75757C5.15257%2066.2172%206.93007%2069.2322%209.00006%2071.9997H60.39V62.9997H60.3675Z'%20fill='%23FFC95B'/%3e%3cpath%20fill-rule='evenodd'%20clip-rule='evenodd'%20d='M31.8826%2029.2496V62.9996H60.0075L31.8826%2029.2496Z'%20fill='url(%23paint1_linear_1_49380)'/%3e%3cpath%20fill-rule='evenodd'%20clip-rule='evenodd'%20d='M3.75757%2062.9997H31.8826V29.2497L3.75757%2062.9997Z'%20fill='white'/%3e%3cpath%20fill-rule='evenodd'%20clip-rule='evenodd'%20d='M60.3675%2047.25V72H81L60.3675%2047.25Z'%20fill='url(%23paint2_linear_1_49380)'/%3e%3cpath%20fill-rule='evenodd'%20clip-rule='evenodd'%20d='M39.7574%2072H60.3674V47.25L39.7574%2072Z'%20fill='white'/%3e%3cpath%20fill-rule='evenodd'%20clip-rule='evenodd'%20d='M60.3675%2040.4997C66.5807%2040.4997%2071.6175%2035.4629%2071.6175%2029.2497C71.6175%2023.0365%2066.5807%2017.9997%2060.3675%2017.9997C54.1543%2017.9997%2049.1175%2023.0365%2049.1175%2029.2497C49.1175%2035.4629%2054.1543%2040.4997%2060.3675%2040.4997Z'%20fill='%23FFC95B'/%3e%3cpath%20fill-rule='evenodd'%20clip-rule='evenodd'%20d='M31.8824%2022.4997C34.989%2022.4997%2037.5074%2019.9813%2037.5074%2016.8747C37.5074%2013.7681%2034.989%2011.2497%2031.8824%2011.2497C28.7758%2011.2497%2026.2574%2013.7681%2026.2574%2016.8747C26.2574%2019.9813%2028.7758%2022.4997%2031.8824%2022.4997Z'%20fill='%23FFC95B'/%3e%3cdefs%3e%3clinearGradient%20id='paint0_linear_1_49380'%20x1='45'%20y1='-18.6396'%20x2='-18.6396'%20y2='45'%20gradientUnits='userSpaceOnUse'%3e%3cstop%20stop-color='%23FF2D55'/%3e%3cstop%20offset='1'%20stop-color='%23FFBC5B'/%3e%3c/linearGradient%3e%3clinearGradient%20id='paint1_linear_1_49380'%20x1='31.8731'%20y1='29.2497'%20x2='31.8731'%20y2='62.9996'%20gradientUnits='userSpaceOnUse'%3e%3cstop%20stop-color='%23A524B3'/%3e%3cstop%20offset='1'%20stop-color='%23FF2D55'/%3e%3c/linearGradient%3e%3clinearGradient%20id='paint2_linear_1_49380'%20x1='60.3605'%20y1='47.25'%20x2='60.3605'%20y2='72'%20gradientUnits='userSpaceOnUse'%3e%3cstop%20stop-color='%23A524B3'/%3e%3cstop%20offset='1'%20stop-color='%23FF2D55'/%3e%3c/linearGradient%3e%3c/defs%3e%3c/svg%3e)
Scene Settings
Edit your scene's metadata
Click the Pencil icon on the top-right of the screen. This opens a series of scene-level properties to edit.
Here you can configure multiple properties including title and thumbnail, scene size, scene categories, and feature toggles.
See Scene Metadata.
Scene details
The Details tab lets you configure several fields about your scene. These fields are shown to players that might visit your scene, for example when expanding the location on the map, when being prompted to teleport, or when sharing a link to the scene on social media. Make sure you make the information here attractive and accurate to drive more traffic to your scene!
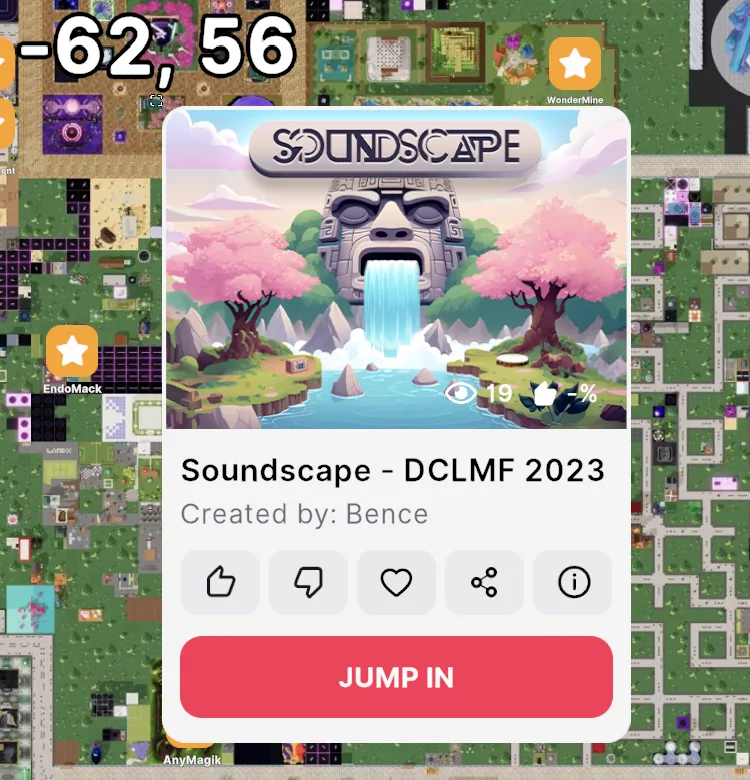
The following fields are available:
- Name
- Description
- Thumbnail
- Categories
- Creator name
- Creator contact email (optional)
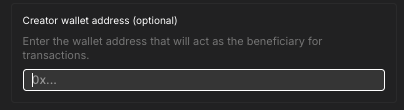
- Creator wallet address (optional)
See scene metadata for more details on these fields.
📔 Note: If you publish your scene to a World, the World has its own name, description, and thumbnail, separate from the scene's. If the World contains a single scene, the World's metadata is updated to match the scene's details on every publish, so this panel is all you need to edit. If the World contains multiple scenes, the World's metadata can only be edited in the Manage tab of the Creator Hub. See World metadata vs scene metadata.
📔 Note: The scene's Age Rating is not edited on this panel. You can set the rating field directly in the scene.json file, or, for scenes published to a World, change the Content Rating in the Creator Hub's World Settings after publishing. Decentraland is an 18+ platform, so the rating to set is A for Adults. See Age Rating.
Scene thumbnail
The thumbnail must be a .png or .jpg image with a 16:9 aspect ratio. 1920x1080 pixels is the size to aim for. Other sizes work as long as they keep the same 16:9 proportions.
An image that isn't 16:9 is refused: importing one shows an error, and choosing an off-ratio image that's already in your project shows Thumbnail not supported and keeps the thumbnail you had.
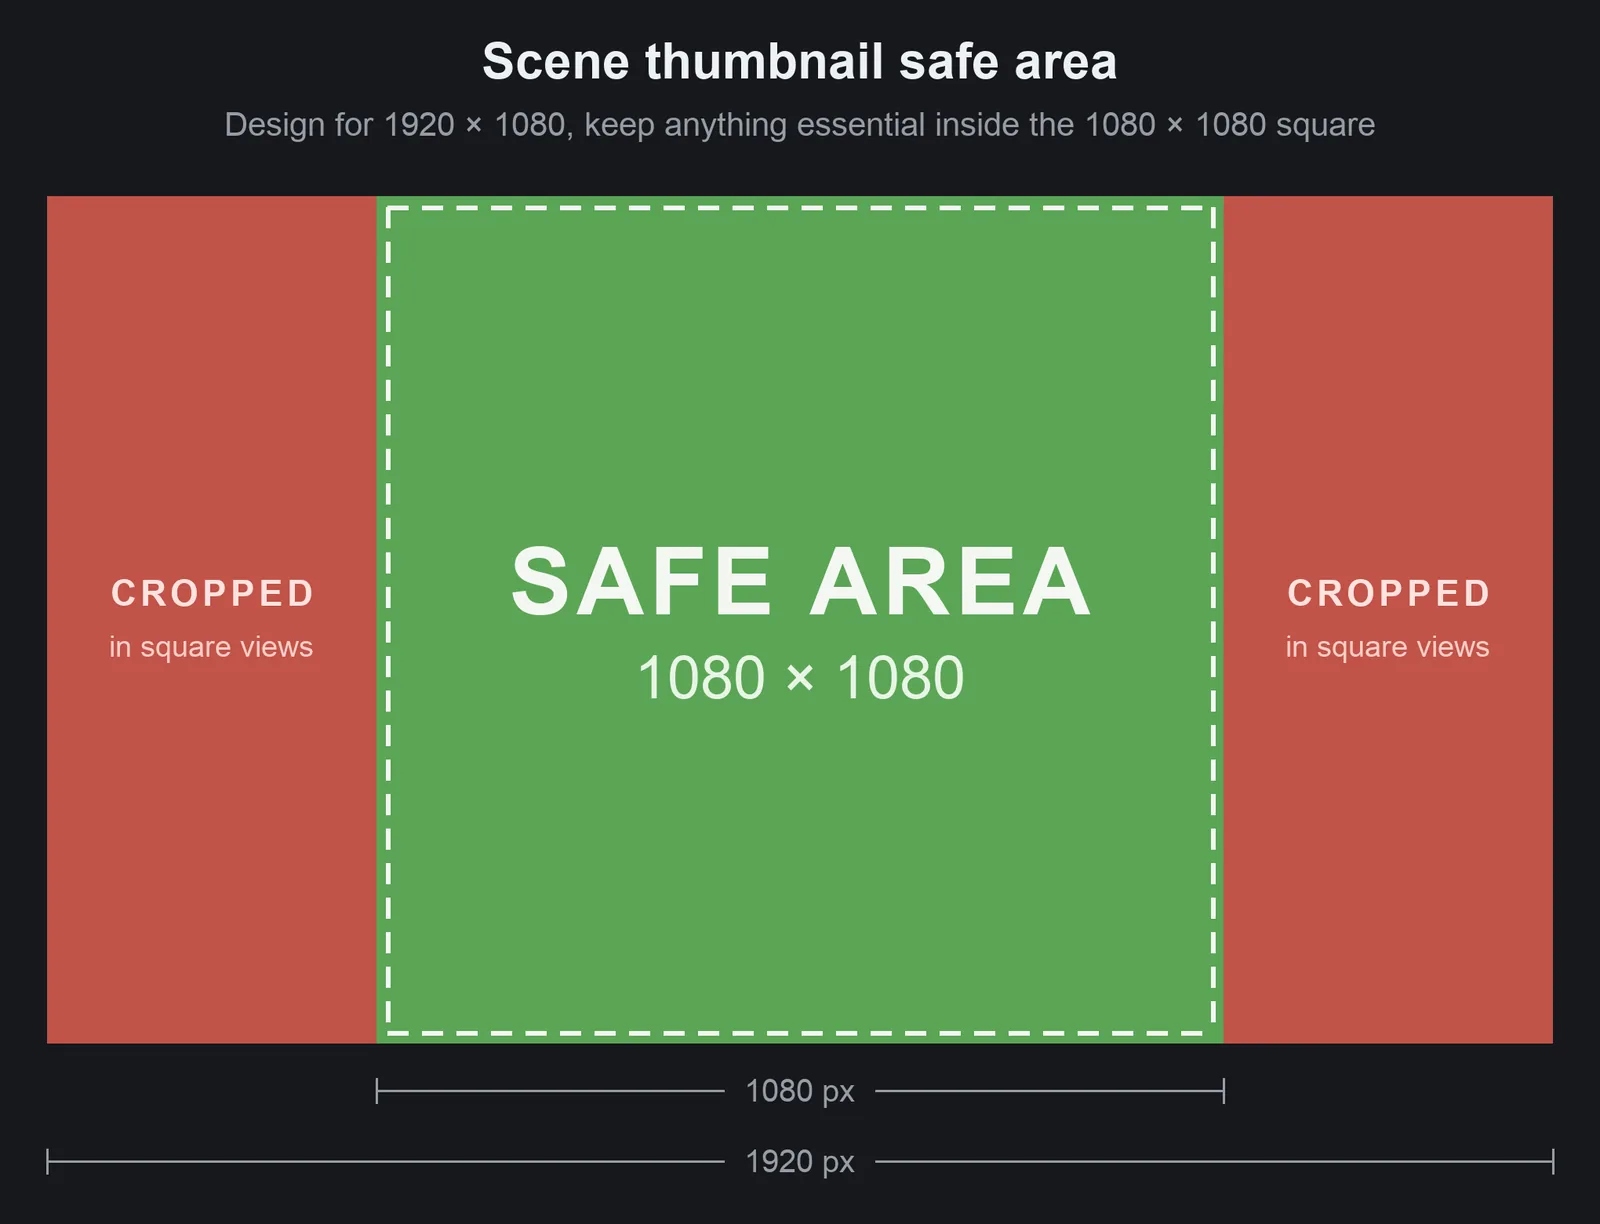
Some parts of the platform display a reduced square version of the thumbnail, cropped to the central square. That cuts about 22% off each side. Keep anything essential, like text or logos, inside that safe area so it isn't lost.
The Details tab shows your thumbnail full width, with those two side bands shaded so you can see exactly what a square view drops, and the image's real pixel size underneath.
💡 Tip: If you don't provide a thumbnail, the scene uses the automatic capture you see on the scene's card. That capture is cropped from the center to 16:9 and never enlarged, so it can end up smaller than 1920 wide. Uploading your own image is almost always better.
Tipping
You can receive tips from players who visit your scene. To enable tipping, got to the Details tab on the scene settings and provide an Ethereum address under Creator wallet address.
When a player visits your scene, they will see a piggy bank icon on the top-left of the screen. Clicking on it opens a modal where they can send you a tip. This menu can also be accessed by opening your scene's info on the map.

The tip modal allows the player to select the amount of MANA they want to send. The player must own MANA in their wallet to send a tip. If the address you provided is linked to a Decentraland NAME, this modal will show the name of the wallet owner besides the Ethereum address.
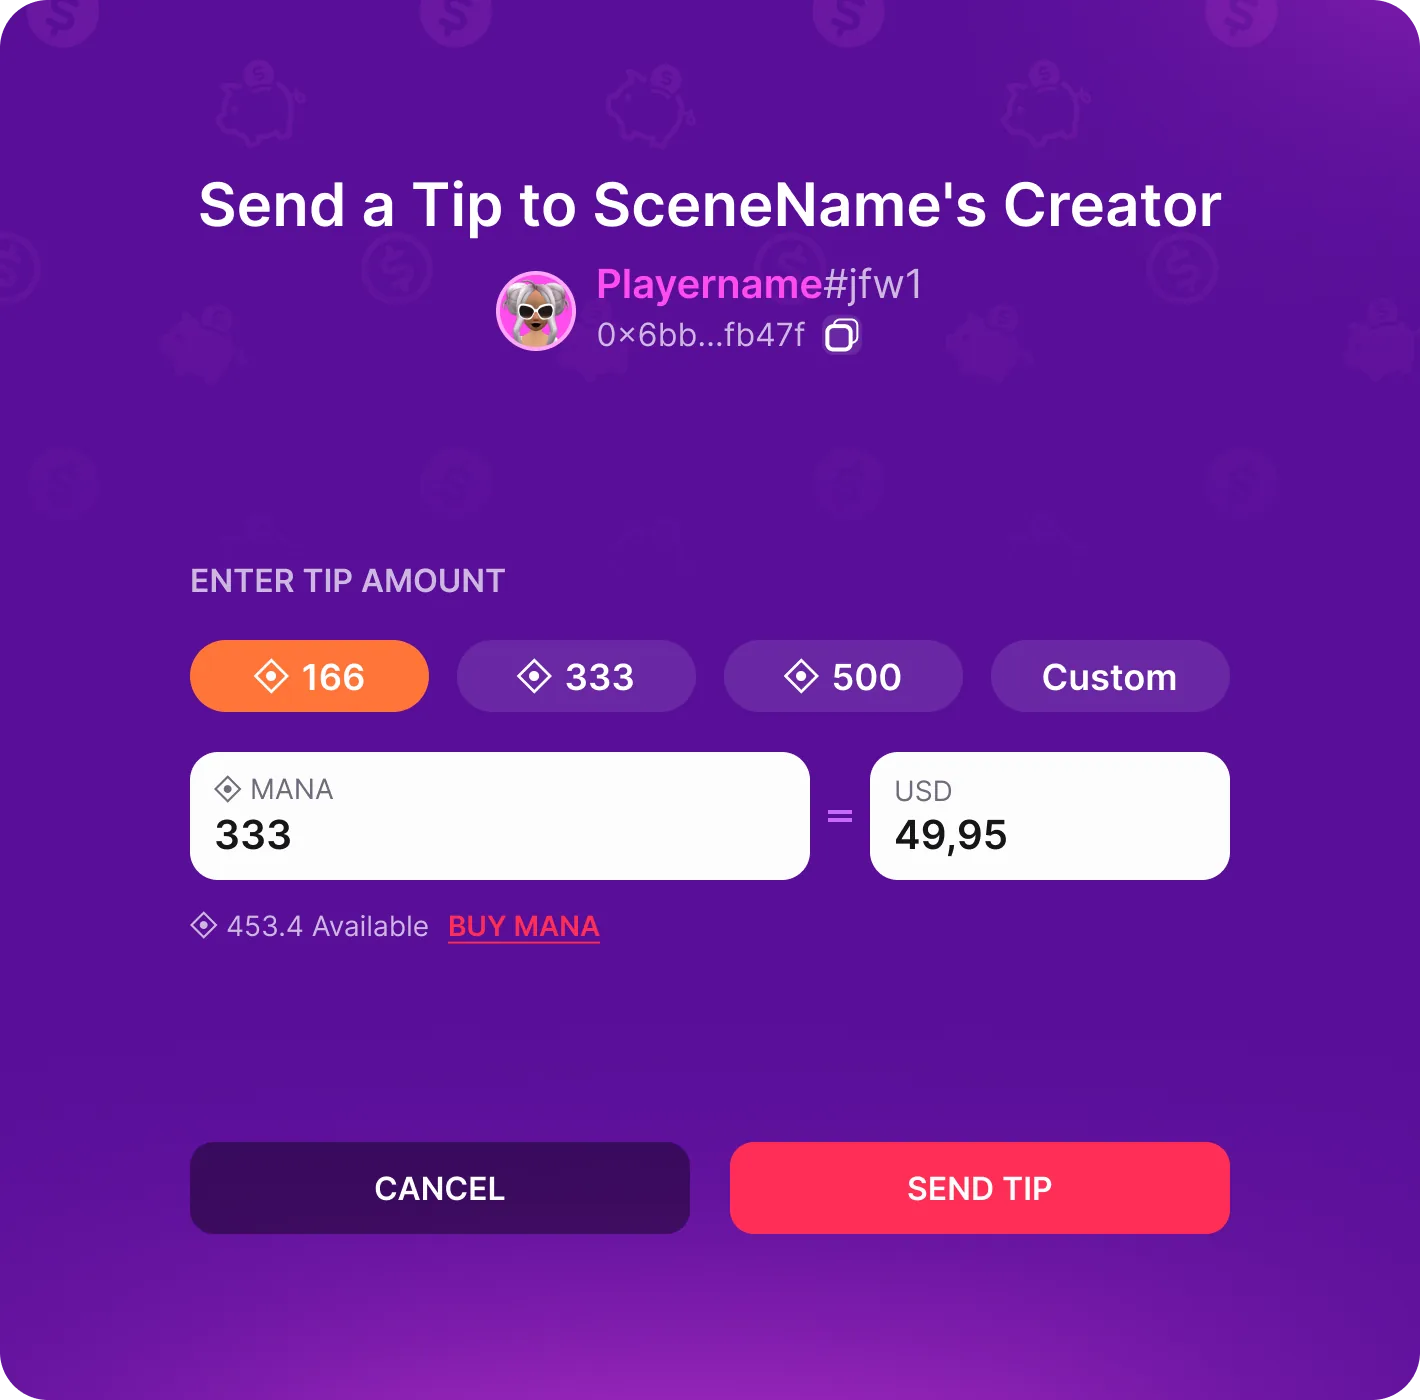
You will receive a notification on the Decentraland notifications tab whenever a player sends you a tip.
Layout
You can edit the size of your scene by clicking the pencil icon and then changing the number of rows and columns.
Scenes in Decentraland occupy one or several adjacent LAND parcels. Each LAND parcel measures 16x16 meters.
Set the number of parcels for the rows and columns and click Apply layout for it to affect how your scene looks on the Scene Editor canvas.
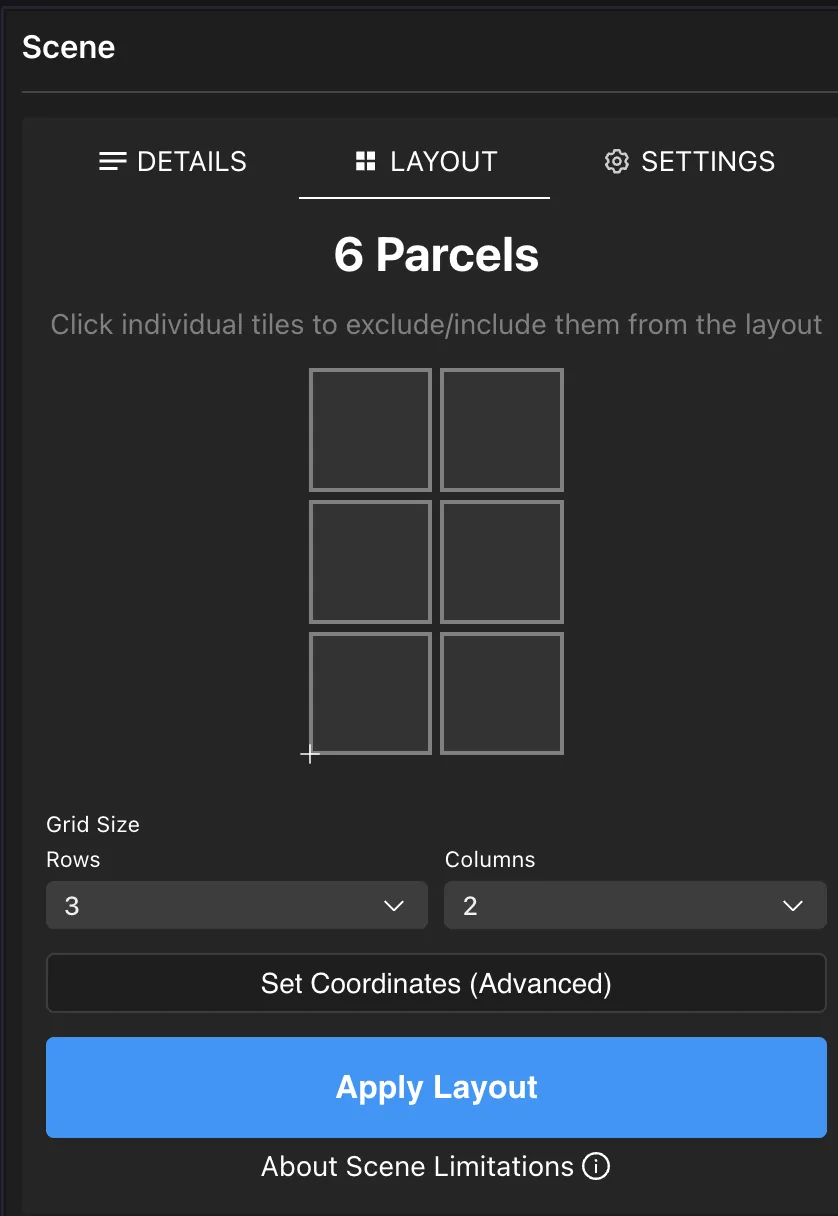
To build something to deploy to LAND parcels you own, make sure the shape of the scene matches the shape of where you want it deployed.
💡 Tip: You can toggle each tile on the grid off by clicking on it. This allows you to draw non-rectangular shapes for your scene layout.
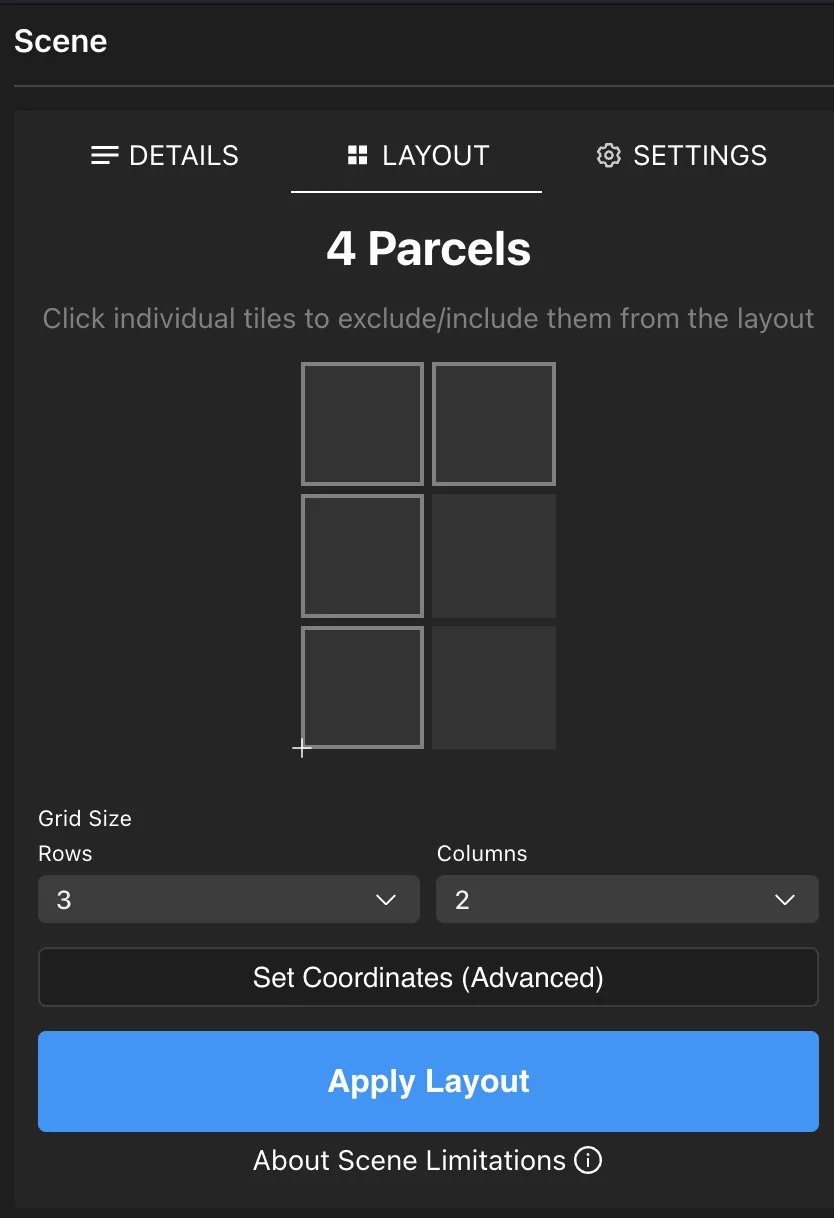
If you own a Decentraland NAME, you can also deploy your scene to a Decentraland World. In that case, you can use any layout of up to 300x300 parcels without needing to own them, but you will have a size limit in MB.
See Kinds of project to better understand the different options.
Advanced view
You can also click the Set Coordinates (Advanced) button to manually list the coordinates of your scene.
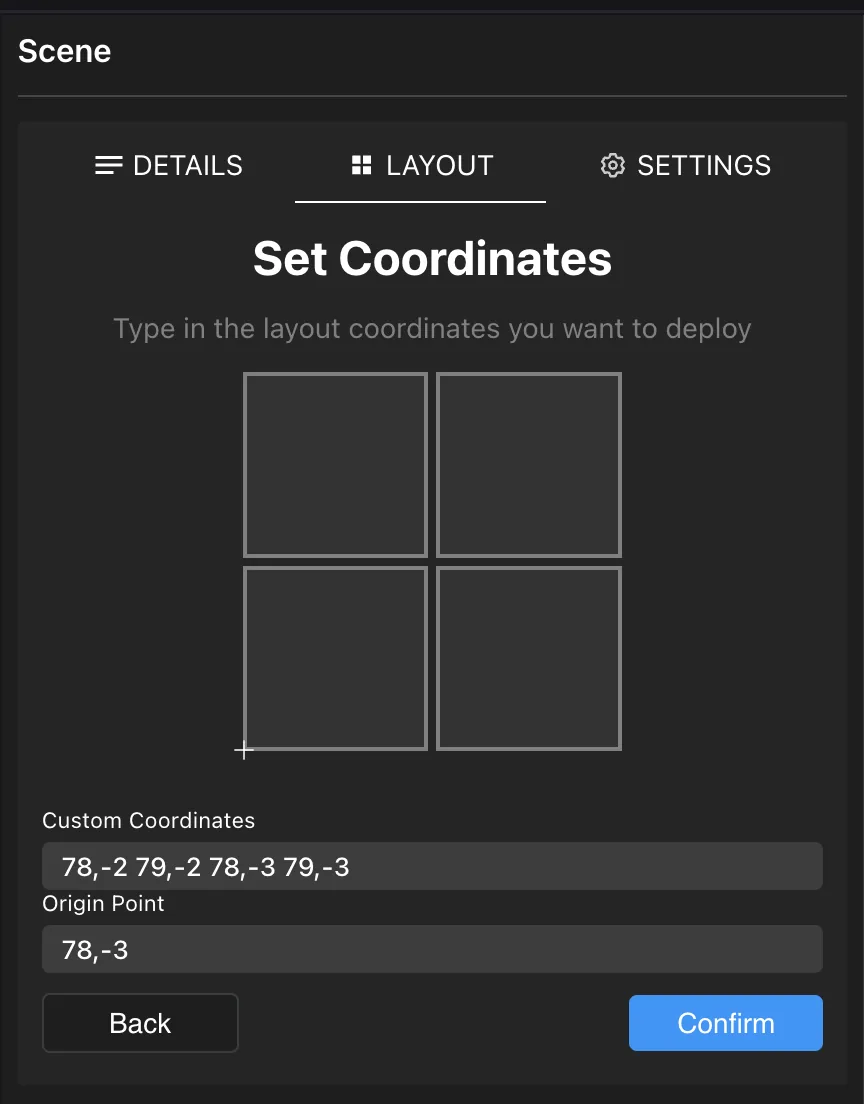
In Custom Coordinates, write the coordinates of each of the parcels where you wish to publish. Separate the x and y coordinate with a comma, and each set of coordinates separated by spaces. Remember that these coordinates must all be adjacent to be valid. For example:
78,-2 79,-2 78,-3 79,-3
In the Origin Point field, define which of the coordinates in the scene should be treated as the point of origin. This has to be one of the coordinates you listed in the Custom Coordinates field. It's recommended to set the parcel on the bottom-left of the scene.
Scene restrictions
You can disable certain functionalities on your scene if you chose, in case they might be abused or clash with the kind of experience you want to create.
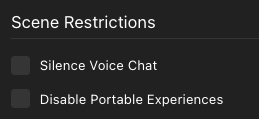
- Silence Voice Chat: Prevent players on your scene from using voice chat.
- Disable Nearby Voice Chat: Prevent players on your scene from using the nearby (proximity-based) voice chat.
- Disable Smart Wearables & Portable Experiences: Prevent players from using Smart Wearables or Portable Experiences.
Skybox Control
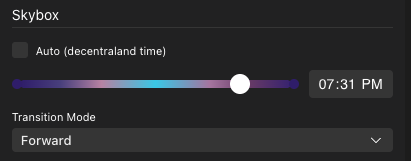
You can control the skybox time of day in the Settings tab. You can set a fixed time of day for your scene. All players will see the scene with this time of day, and the skybox will not follow the day/night cycle.
In the Creator Hub, open the scene settings and click on the Settings tab to find the Skybox section. Uncheck the Auto option to avoid using the day/night cycle and set the time of day you want.